home tutorials features parties custom orders

Tuesday, March 20, 2012

Pink Poodle Bows Ruffle Sleeve Top & Mini Skirt


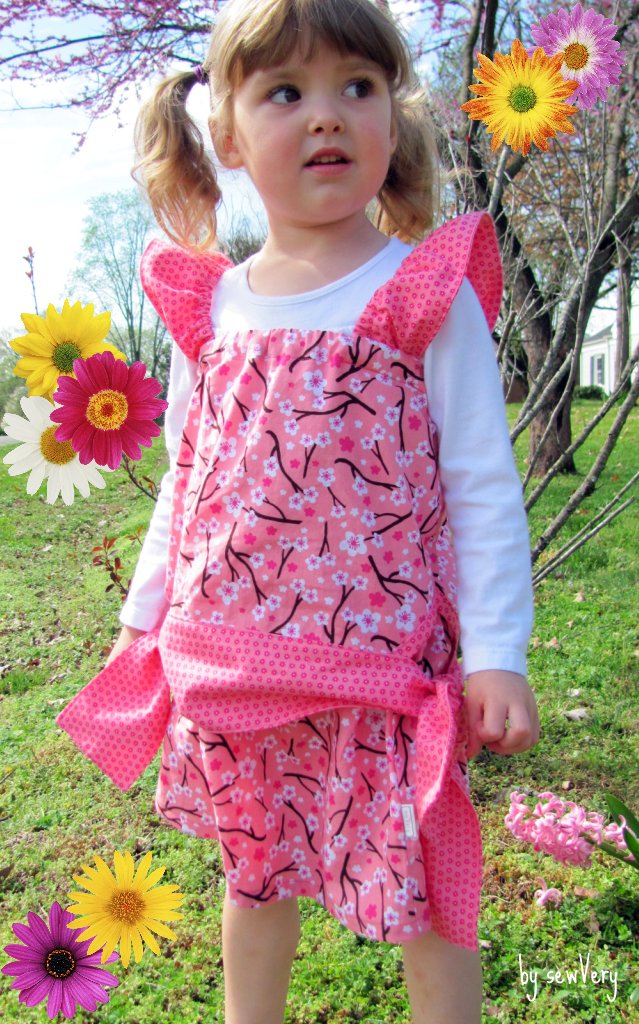
With all the warmer weather we have been having, I decided I needed to finally make Ella the adorable Ruffle Sleeve Top and Mini Skirt from the pattern I won from Pink Poodle Bows back in late January.  You can read all about the contest I won hosted by KoJo Designs here.

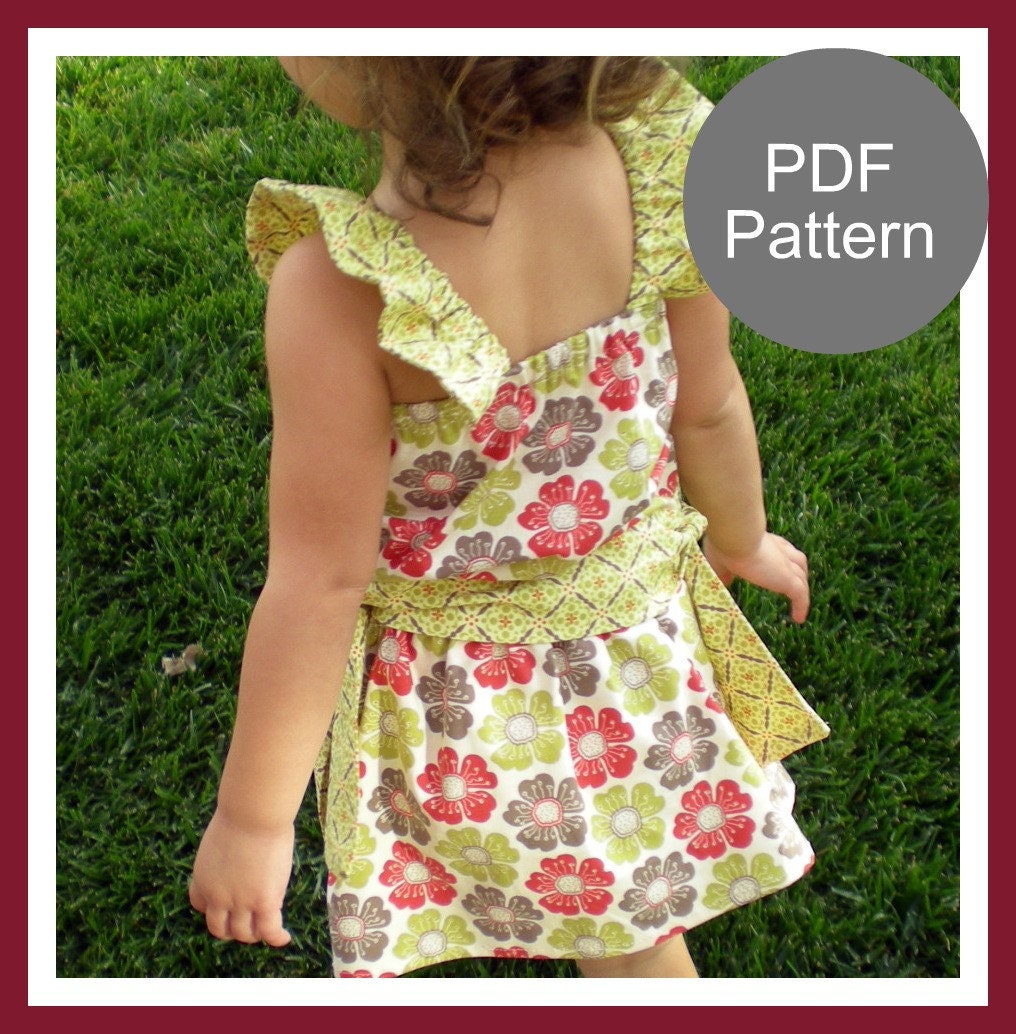
PDF sewing pattern...The Ruffle Sleeve Top and Skirt  12m-5T, baby girls easy sew
Photo from Pink Poodle Bows
The pattern instructions are super easy to follow, and although you don't have to have paper pattern pieces to cut it out, they are provided for those who prefer them.  I just used the dimensions specified for a 4T and cut out all the rectangles, but I did use the cut-out guide provided in the pattern for removing a curve piece from the sleeve and a triangle from the bottom of the top.

The skirt took probably 15 minutes total to make.  I'm really happy with how it fits Ella, and I plan on using this pattern for making a few more skirts for the summer.


The top was very easy to sew together, and I really liked her tips for making and sewing the belted band onto the shirt.  However, if I make this top again, I think I will half the width of the band.  The proportions just don't seem right for such a little top, and because it is so wide, it wants to bunch up in the front.  I think 2" wide would be better.


The flutter sleeves are adorable, and Ella loves them because they make her feel like a butterfly!


I would definitely recommend this pattern to anyone, especially a beginner sewer.  It is simple, has easy to follow instructions, and comes with pattern pieces for those who prefer to have a paper guide when cutting out their fabric.  So, please head over to Pink Poodle Bows and check out all the other really cute patterns she has to offer.  Thanks again for the pattern!


Monday, March 19, 2012

The Madalyn Skirt & Matching Doll Outfit


A couple of weeks ago, I made this skirt out of some larger "scrap" pieces of the Joel Dewberry Heirloom fabric.   I emailed my best friend, Melissa, to get her daughter's measurements to see if it would fit her, and sure enough, it does!  

I'm going to see my friend soon (for like the first time in almost 3 years), and I wanted to take her daughter a little something.  So, we now have The Madalyn Skirt!   I sent Melissa the pictures this morning, and she said her daughter would love it.  


This skirt can be worn with either side in the front, and it was sewVery easy to make.  You can do it, too!  Sorry I don't have step by step pictures, but it is so simple, I know you can do it!  Here's how...

Cut one panel 19" x 19", one 14" x 19", and two strips 2.75" x 19".  Next, sew one of the narrow strips to each side of the smaller panel.  Then sew the pieced panel to the larger panel.  

I decided to zig zag down the seams of the strips to add a little detail.  You can do this, too, but it is not necessary.

Next, make the casing for the elastic waistband.  Turn down 1/4" and press and then another 1" and press it.  Sew your seam about 1/8" from the edge of the casing but remember to leave a 2" opening so you can insert the elastic. Take your child's waist measurement and subtract 1" to 2" and cut a piece of 3/4" elastic this length.  For the Madalyn skirt, I used a 24" piece of elastic. Put a safety pin on one end and work it through the casing.  Now, sew the two ends of the elastic together and then sew the casing opening closed.

Finally, turn down 1/4" and press and then another 1/2" and press for your hem.  Sew your hem seam about 1/8" from the folded under edge and you are done!

Melissa had asked me a while back if I ever sewed doll clothes.  At the time, I had not even considered it, but since I had a few smaller scraps of the fabric left, I thought I would try making a matching doll skirt and bag for Madalyn's American Girl doll.  Each skirt panel is approximately 7" long and 8" wide.  I just sewed those pieces together and then serged the top and bottom, turned them under 1/2", hemmed the bottom and made a casing at the top.  I then used a 10.5" piece of 1/4" elastic for the waistband.  


The purse was very easy to make as well, but it takes some patience sewing such small pieces!  When I have a little more time, I'll draw up the pattern dimensions, along with that for the skirt and post them for download.


Now I need to make her doll a white t-shirt to go with the outfit, and I've got to put together a little something for her son, too.  I'm thinking an Auburn University pillowcase may be just the thing! War Eagle!

Can't wait to see you and your family soon, Melissa!

Friday, March 16, 2012

A Patchwork Purse and Coin Pouch


I've been sewing. I promise! I just haven't had much time to put together blog posts, pictures, etc. But I did make a few, quick pics of the latest purse I've made, plus this really cute little coin pouch.


Ok, first things first.  The Patchwork Purse was made using Simplicity 2617 View B.

I first saw this pattern/purse over at Sam's blog, Cup of Tea and Slice of Cake, where she made the same purse, View B, using Joel Dewberry's Heirloom fabrics, too.  I loved her version of this purse, so I immediately knew I wanted to try it as well.  So, the next time Simplicity patterns were on sale for $1, I grabbed it!

Here's my version of this Patchwork Purse.


Yes, I used the same Joel Dewberry Heirloom fabrics as some of the other purses I've made so far. It's amazing how much you can make out of just a yard of each fabric!  Anyway, I hope you like this one too.

I think the size of this bag is just right.  It is roughly 13.5" W x 9" H and has a large pocket on the inside and a magnetic closure.


The original pattern calls for a zippered interior pocket, but I wasn't up to that challenge last week when I made this.  However, I have found a couple of great tutorials over at Emmaline Bags here and here for installing an interior zipper pocket if you want to go ahead and give it a try!

It may be difficult to see in these pictures, but I did add the decorative zig zag stitch at the seams of the patchwork pieces.  I had some trouble getting my sewing machine to zig zag properly at first (you would only see the correct zig zag stitch on the bottom of what you were sewing), but I made a call to my local Bernina service center and found out all I needed to do was turn the screw on my bobbin casing a 1/4 turn.  Fixed the problem instantly!


So, if you are looking for a great purse that's attractive and easy to make, check out Simplicity pattern 2617.  It has patterns for three purses in all in addition to a zippered pouch, tissue holder, and key fob.  And if you don't like patchwork, then simply cut out the front and back from a solid piece of fabric! I plan on trying out one or both of the other purses in the near future plus all of the accessories.  This is just a great pattern, especially when you can buy it for $1!


Now, onto the little round pouch I made, too.  I was checking out all the link up parties a few days ago when I came across someone's post about these little round pouches they made as quick gifts. They were so cute and looked pretty simple, and since I wanted more practice with installing zippers, I decided to make one.


I didn't bookmark the link up post where I found this originally, but I did save the link to the tutorial that it referenced.  If you want to make one of these sewVery cute little round pouches to store your pocket change, earbuds, or even to keep jewelry in when you travel, here's where you can learn how! 

Now I'm wanting to make a lot more of these cuties, but I need zippers!  I'm already planning an order from Zipit on Etsy.

This little round pouch takes very little fabric, so scraps are perfect!  Add a zipper and a little batting and a key ring and you are good to go!  I used three different scrap pieces of my Joel Dewberry Heirloom fabric to make this one, so it matches the purse I just made perfectly!


One thing I did omit from the original tutorial is the topstitching around the entire circle.  I didn't like the way that looked, and I'm very pleased with the finished product without it!  


It reminds me of of those tacky little plastic coin pouches that my grandfather used to carry in his pocket.  I fondly remember him giving me a dime or a quarter from it when I was a little girl.  My dad used to sell them at his pharmacy years ago, too.  Here's an example.  I guess they still make them!
 

Anyway, hope you have a great weekend and find something fun to make!  I'll be back with a couple of other projects soon!

UPDATE:
My Little Round Pouch has been featured over at Pam's blog, Threading My Way!  Please check out her site and all the fun link up parties that she hosts! Thanks again, Pam!


And my Patchwork Purse was featured on Sew Country Chick!  Check out this great site and link up party, too!

Sunday, March 11, 2012

A Beautiful Flower Party for Ella


My baby just turned 3!  Yay!  Boo!  I'm so happy to see her getting bigger and smarter everyday, but at the same time, I'm sad that I no longer have a baby.  Three is a fun age though, and she's already potty trained, so I think I'll keep her!


Anyway, my lovely daughter requested that she have A Beautiful Flower Party. What can I say?  She loves flowers and finds them all to be beautiful.  So, what could I do to make her happy--make a garden of beautiful felt fabric flowers!


If you read my blog, then you already know that I recently posted a quick tutorial on how to make felt fabric flowers.  They are super fun and easy to make.  Just be careful with the hot glue gun!


We decided to travel "back home" where my husband and I grew up to visit family and to have Ella's 3rd birthday party.  Lots of people came to celebrate the big day for Ella and to enjoy the delicious BBQ and fixins we supplied for lunch.  After the meal, my sister-in-law helped me put together the "cake" so the birthday girl could get to the important stuff--opening presents!

Ella is not a big cake eater, so she really didn't care what kind she had (I thought).  Since she wanted a flower party, I decided to make some yummy Mississippi Mud Cake (my mom's famous recipe) which sort of looks like dirt, hence the name Mud Cake.  At the last minute, out of no where, Ella asks for pink cake!  Well, dirt is not pink, but I decided to throw some in the mix just the same.  I attempted to make some individual bunt size strawberry cakes, but they stuck to the pan and just crumbled.

My original idea had been to use the small green flower pots to put all the cake in, but after washing them several times, they still had a plastic odor. So, we put some crumbled strawberry cake in the bottom of the birthday cups instead, then added a dollop of cool whip, threw in a few gummy worms, and placed a piece of Mississippi Mud Cake on top!  And to finish it off, I decorated each pot with one of the beautiful flowers I made of felt.  I simply left a small opening in the felt circle that covers the back and then slid a new pencil (eraser side) into that little pocket it created.  The pencils worked out great since some of the flowers were a little heavy.  The flowers make great little take home gifts for the guests, too.

And there you have it!  A crazy dirt cake flower garden!


Ella loved everyone singing Happy Birthday to her and then getting to blow out the candle.  She even asked my sister-in-law to "make fire" at least three times, and once she insisted we sing to her again! So sweet!


Does anyone recognize the dress?  Well, Ella finally was allowed to wear it!  I made it a couple of months ago from a pattern I won.  You can read all about it here.  The fit was perfect, but since it was still a little chilly, she wore under the dress this white shirt with flouncy sleeve cuffs.  Oh, and I almost forgot, I turned one of the felt flowers into a barrette for Ella's hair.  It perfectly matches the flowers on her dress!  Two other small flowers were turned into pins.  I wore one.


This is the best picture of me taken at the party--seriously.  See my adorable son in the background shoveling gummy worms into his mouth?  He found the ones we didn't use in the cake and ate them all before I knew it!  I love him!


He was a very good big brother and helped Ella open her presents.  I think he was as excited about her surprises as she was!


I didn't do much with decorating for this party except hang up a few flower themed items that I bought at Dollar Tree.  I guess party decorating is just not my forte.  But the most important thing is that Ella loved it, and I know she did!  Happy birthday to my big girl!

Oh, and this is what happens when you play and party hard all day and night!


Saturday, March 10, 2012

Vintage Patterns and an Antique Thread Case

This past weekend, we traveled out of town to visit with family "back home" where my husband and I grew up.  While there, I found an old box of sewing patterns that once belonged to my mom (and some to my grandmother). Most were for things she had made me.  I picked out some of my favorites and brought them back to my current home in case I want to make Ella a vintage outfit.

Here's what I found...


I'm pretty sure I have a pink skirt with suspenders made from the Simplicity pattern at the top right.  It's stored somewhere deep in Ella's closet right now or else I'd get it out to make a picture.  It has some condition issues, so I never made Ella wear it.

My favorite find is Simplicity 6124--the top with the peplum.  Ella just wears a size 3/4 now, so I guess I'll have to wait to try that one out unless I decide to do some pattern resizing.  After the sewing day I've had today, I think that won't happen any time soon.


The top two patterns here are a couple more of my favorites.  The maxi dress is so cute, so that is going on the to do list as well, and I just love the dress/top from the Simplicity 5483 pattern. My mom used to sew for other people, and I think that is where all three of these patterns came from.  


Ok, these three patterns were definitely my moms.  I had the wrap around skirt, the long skirt with big pockets, and the dress with the ties at the shoulder.  Skirts with fitted waists were always hard to fit on me because my natural waist is not much smaller than my hips.  Still have that same problem today.


This group of patterns brings back the most memories, probably because they were things my mom made me in high school and the first year or two of college.  We loved the Laura Ashley patterns (there's another one that I didn't find) and made them all numerous times.  For some reason, we called the romper a bubble romper.  I'm not sure if that is what everyone else called them back then or if that was just something my mom and I made up!

These dresses/jumpers were so large and loose fitting that I wore them years later when I was pregnant with Connor!  They worked great until the last month or two of my pregnancy when I outgrew the bust!  They are all now neatly packed away in my attic.  

Whew!  What a stroll down memory lane!  I love the memories though, and am so thankful to have them!

Just before we left "back home", my mother-in-law told me her sister had left me an antique thread display case if I wanted it.  I didn't hesitate to answer "yes!", and we managed to fit it safely into the trunk of my car for the 6 hour return drive.  It was already wrapped up for travel, so I didn't even see it until the day after we were home and unpacked.  It's made of all metal except for the front glass.  I've searched for an exact one online to try and determine its approximate age and value, but I haven't found one like it yet.  I know it's not a one-of-a-kind because my mother-in-law has one exactly like it!  


Thanks, Jeannie, for this wonderful treasure.  I promise to use it and take good care of it!  

What goodies have you found or been given lately?  I love making old things new again.

Friday, March 9, 2012

Felt Fabric Flower Tutorial

Now say that three times fast!  Whew!


I've got a quick tutorial for your today on how to make fabric flowers from felt.  You know, the cheap craft felt sheets you buy.  These are super simple and so fun to make.

I know you've seen these a lot out there in cyberspace, but I haven't seen any quite like mine.  My quick tutorial will show you how to make a large felt fabric flower that looks a lot like a zinnia or maybe a dahlia. I've got some you can see in the final pictures that look like daisies, too. Ok, so here we go!

Step 1:  Cut the strips for your Flower Center and Flower Petals out of the craft felt fabric sheets or if you want to go a more expensive route, use wool felt.


The dimensions shown above are for making a large flower, but you can vary the width of each piece however you want to make up all kinds and sizes of flowers.  I also used a 1" to 1.5" wide piece for the Flower Center and 1.5" to 2.5" for the Flower Petals on a lot of small or medium flowers.  Just play around with it and see what you come up with, too!

Step 2:  Glue the strips.


Step 3:  Cut the petals into the strips.


Step 4:  Cut the Flower Center.


Step 5:  Roll and glue the Flower Center.


Step 6:  Add the Flower Petals and keep rolling and gluing.  We're almost done!


Step 7:  Glue a felt circle to the back to cover up any glue that oozed out from the rolling (this part is optional but makes the overall flower look much neater).  Also at this point, you can glue a barrette or pin to the back in you want to wear it.


Voila!  A Felt Fabric Flower! 


I'll show you very soon why I made all these Beautiful Flowers (hint, hint)! Aren't they sewVery pretty!?


See how you can vary the center of the flower?  You can use different colors or you can omit the step where you cut the center and simply just roll and glue it up.


Have fun making flowers and have a great day!

This tutorial was featured on March 30th, 2012 at Sew Can She.  Please check out their blog and sign up for their daily tutorial emails!

One new sewing tutorial every day.

UPDATE:
This tutorial and all photos are property of sewVery and are NOT to be reproduced, rephrased, or copied and reposted on your blog!  As with all other content and photos on my blog, it belongs to me (Veronica) and you may not use it on any other blog or social media without my express written consent!  If you wish to share my idea, please contact me at sewvery(at)gmail(dot)com for permission.