Wednesday, October 31, 2012

So I Bought an Embroidery Machine


What was I thinking?!  Days before I left to go to the Sewing Summit, I ordered a Brother PE770 embroidery machine off of Amazon.


I had debated the idea of purchasing an embroidery machine for some time, but it was my friend Lila's oohing and aahing over a couple of "stinkin' cute" reversible dresses that my friend RaeAnna (of Sewing Mama RaeAnna) appliqued for me that pushed me over the edge!  Before I knew it, I was researching machines and placing an order!  I had no idea what I was getting myself into!  Ha!

It was at least a week after I returned from my trip before I could really try out my new "toy", and things didn't go so well at first.  During my test run of the new embroidery machine, the upper thread wrapped around a small piece of felt that is attached to the bobbin case with some adhesive on the back. Of course the machine jammed, and I had to take the metal plate off just to clean out the mess.  The little piece of felt was now not so sticky anymore and several more similar failures occurred.


At the time, I really had no idea what was the best stabilizer to use with cotton quilting fabric or knit fabric.  I asked the ladies at the embroidery machines at Joann's and was directed to a package of tear-away stabilizer. I'm sure tear-away stabilizer works well for some applications, but I did not like it!


After discussing these issues with RaeAnna several more times as well as consulting numerous online resources and a Facebook embroidery group, I decided to try some of the Pellon #40 cut away stabilizer.  I also took a little Elmer's stick glue and stuck that little felt piece back down to my bobbin case (because the Brother authorized service rep said it would be at least 3 weeks before he could even look at my machine).  After making these adjustments as well as tightening the bobbin screw about an eighth of a turn, I finally had success!

I made a couple more test runs and then made my daughter this cute little t-shirt!  My first appliqued item!  Yay!


Now my friend Lila had a friend who wanted me to make her granddaughter a similar "stinkin' cute" little reversible dress.  After exchanging emails and pictures of fabric and applique designs back and forth Monday morning, this is what I made...

Don't you just love this little turkey?  I used Joel Dewberry's Heirloom fabrics for the appliqued feathers.


Covered button for the closure on the back using more of the Heirloom fabric.


And for the reverse side of the dress, we have a cute elf shoe filled with a lolly pop and candy cane.  I just love the soft pink and green colors!  Don't you?  The shoe fabric is the green on green chevron from Riley Blake Designs.

This font is called "Bonnie", and I purchased it from 8 Claws and a Paw. RaeAnna told me about My Editor free embroidery software that I downloaded and used to merge the individual letters of the name into one embroidery file for my machine.  It was pretty simple to use, especially since RaeAnna walked me through it over the phone!


Covered button for the closure on this side of the dress as well.


I know I still have a lot to learn, but I was extremely pleased with the end result.  I certainly hope that little Lucy will enjoy her new dress as much as my daughter and Lila's daughter have enjoyed theirs!  Thanks again, RaeAnna, for all your help!  I hope I'll eventually be able to embroider as well as you!

Saturday, October 27, 2012

Chevron Washi Tunic


Has anyone else caught the Made by Rae Washi Dress/Tunic fever?!  I know I have!  This tunic is my second Washi pattern item, the first was a Washi dress, and I think I love it even more than the dress!


And I just learned that Rae has added a pattern piece for adding long sleeves!  I can't wait to try that out.

If you recall from my post on making the Washi dress, I didn't make a muslin before I jumped right in and made the real thing.  The fit of that dress was quite good, but there were a few things I wanted to do differently when I put together the tunic.

First of all, I lowered by about a half inch the dart for the bust.  In order to do this, I just traced the pattern bodice piece again and adjusted the dart location accordingly.  This made the bodice of the top fit better on me for sure.


Secondly, I started the rows of shirring about 3/4" to 1" lower than where the pattern specified.  This adjustment also provided me with a better fit by preventing the back from having that "riding up my back" feeling.


Next, I used Rae's video tutorial on how to line the bodice of the top instead of using facings.  I pretty much knew how to do this already, but I watched it completely because you never know when you might learn a new trick or two! For my bodice lining, I used some basic muslin fabric.  It's very soft and matched the light colored chevron on my fabric.


I don't remember Rae's tutorial including under stitching of the lining along the neckline, but I added this in order to help keep the neckline seam nice and smooth.  


I'm not a big fan of hand sewing, so if you are one of those people that wants the inside of a garment to look as lovely as the outside, then you better skip this next picture!


From now on, I'll definitely be lining the bodice instead of using facings.  This method was just as quick and easy, but in the end, you don't have to worry about the facing pieces trying to pop out the neck opening.


And the final adjustment I tried to make didn't work out like I had hoped. When I made the dress, I went with the U-shaped cutout along the neckline, but I felt like the top was constantly gaping open.  For the tunic, I decided go with the basic scoop neckline and cut the shoulder width and neckline by the XS size of the pattern while using the M size for everything else.  Sadly, this didn't resolve my problem as you can see in some of the pictures.


If anyone has any suggestions on what I should try next, please leave me a comment!  The gaping is not a huge problem, but I am definitely aware of it, especially when I have to bend over.

When I wore this top and the dress at Sewing Summit, I had people constantly saying they loved it and asking me if I made it.  This time, I was proud to say, "Yes, I made it!", and I know for a fact that a few people immediately pulled out their phones or ipads and looked up the pattern!


All in all, this is a great pattern and a great top--no doubt!  The Washi tunic only took me a couple of hours to sew, and I just love wearing it!  Can't get much better than that.

So you'll definitely be seeing more Washi dresses and tops from me in the future--most likely very soon!  I've got some beautiful voile fabrics that I've been hoarding, and I'm going to be totally selfish and make myself a long-sleeved Washi tunic with it.

125

Thursday, October 25, 2012

Sewing Summit Swag


This is it!  My final Sewing Summit highlights post.  It's all about the swag!


The sponsors of the Sewing Summit did not disappoint.  I literally had a wagon-full of goodies!

Upon registration, everyone was given a Mood bag filled with things like patterns, a thread box tin, batting samples, tote bags (one from the Green Bag Lady), scissors, and more.


Each and every time we entered the banquet hall for a meal, there would be more freebies sitting in our chairs, like a copy of Ruby Star Wrapping, Mollie Makes, and a BabyLock bag with information on their machines along with a needle and thread sample.


During the Saturday luncheon with keynote speaker Joel Dewberry, everyone received this colorful guide to his latest venture--sewing patterns.


Craftsy handed out cute little gift bags with everything needed to make your own mason jar pin cushion as well as a coupon for a discount on Deborah of Whipstitch's A-line skirt class.

And Jessica from Me Sew Crazy put together (and I'm being literal here--she really made the tote bag) these amazing bags full of fabric, Pellon samples, cutting mats, scissors, rotary cutters, boxes of thread, magazines, and patterns!  These swag bags were only handed out to the attendees of the Joann's Fabric and Craft Stores Girl's Night Out Dinner that I attended.

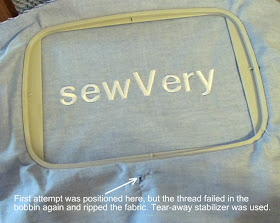
Jessica even hand embroidered my blog name and framed it in a cute little hoop.  She is so sweet!


Finally, I managed to get some fat quarter samples from Riley Blake as well as FQ bundles from Windham Fabrics and Clothworks. Oh, and I can't forget the t-shirt my roommate Lindsay gave me from CraftFoxes.


Everyday of the Sewing Summit felt like Christmas morning!  What fun!  And to top it off, my roommates gave me some amazing gifts as well.

Rachael from Imagine Gnats, gave me these gorgeous Liberty of London fat quarters.  I know your jealous!  Aren't you?


And Lindsay from Lindsay Sews, made me this very useful notebook/business card holder from LBG Studios free tutorial.  I enjoyed using it so much during the conference that I'm still carrying it in my purse now!  Thanks ladies!


I made my roommates these laminated drawstring bags filled with some treats, but I'll save the details on them for another day.


Thanks again for following along on my Sewing Summit Highlights journey! Hope you'll stick around to see all the new projects I've been working on lately.

Wednesday, October 24, 2012

Sewing Summit Highlights - Part 4


OK. This is the next to last Sewing Summit post I'll make, but I promise, it's a good one!  If you want to catch up and read the other three I've posted so far, you can click Part 1, Part 2, and Part 3.

Today, I'm talking about Joel Dewberry!  He was the keynote speaker at the Sewing Summit luncheon on Saturday. For those of you that don't know who Joel Dewberry is, then shame on you!  But seriously, he is a very popular fabric designer who just so happens to be one of my absolute favorites!

Joel Dewberry at Sewing Summit
Photo from Sewing Summit blog
Mr. Dewberry gave an excellent keynote address filled with information everyone wanted to know. He gave us the history of how he became a fabric designer, what inspires him, and how he and his wife work so well together. He was a very engaging speaker and didn't seem to feel uncomfortable one bit being in a huge room of mostly women!

Another exciting thing to see besides Mr. Dewberry himself was a sample of his new collection, Notting Hill.  This collection is simply divine.  One color palette in this collection is orange and pink together which I simply love, so I think I've figured out what fabric I will be buying as soon as it is for sale!

Just before the luncheon ended, I realized that my camera batteries were dead!  Just perfect! So as soon as lunch was officially over, I ran back to my room to grab my spare batteries and pull up pictures of the things I've made using Joel Dewberry's Heirloom collection.  I then ran back to banquet hall and was the last guest to speak to Mr. Dewberry before he left!

I was so nervous and excited and was probably talking in super fast mode, but he was so polite and even posed for a picture with me!


If you've ever read any of my old posts, you'll know that I love Joel Dewberry's Heirloom collection of fabric.  In fact, those posts are some of my most popular ones.  Here are a few things I've made with the Heirloom line. And you know what, I shamelessly showed Mr. Dewberry (very quickly) these pictures.

Read about my first Sweet Pea Tote here
Another Sweet Pea Tote--I call this the Big One!  Read about it here.


Again, a Sweet Pea Tote!  Here's the post.  
A cute romper I made for Ella.
Cute Little Wallet that I gave away in a contest.
Coin Pouch Post

Patchwork Purse post.

The Madalyn Skirt and Matching Doll Skirt and Bag post here.


See?  I was serious when I said that Joel Dewberry's Heirloom collection was my favorite!  And I'm sure there will be lots more made using it in the future since I have a stash of it in every colorway.  

Check back tomorrow for my final post on the Sewing Summit.  It's all about Swag!