home tutorials features parties custom orders
Showing posts with label Shwin and Shwin. Show all posts

Thursday, November 7, 2013

Pattern Anthology Winter Wonderland Tour

I find it extremely difficult to define my daughter's style (and my own for that matter).  She's not boxed into one look but definitely likes variety--one day it's a fancy dress with ruffles, the next day it's an old pair of sweats paired with a t-shirt, purse, and jewelry!  But no matter what it is, Ella always makes sure the outfit has a feminine touch.

Her outfit for the Pattern Anthology Winter Wonderland Pattern Collection blog tour is no exception!


With cooler weather fast approaching, I decided to swap out the summer clothes in Ella's closet and replace them with winter clothes.  The problem is that she had outgrown almost all her pants and jeans from last year.  Lucky for me (and for Ella, too, I guess), I had just signed up to make a pair of Tree Climber Trousers and a Sweet Bonnie Top for the Pattern Anthology tour.  She'd have at least one new outfit for fall and winter soon.

Sometimes the most difficult part of a sewing project is choosing the fabrics, but not this one!  I immediately knew I wanted to use the hot pink, white, and silver striped knit that had been lying around waiting for that perfect project.  Every time I open my box of knits, Ella begs me to make her something with it, and this time I got to say yes!  She was thrilled.  


This led me to remember some teal stretch corduroy with silver specs in it that I bought a couple of months ago.  When I finally found it, it looked great paired with the pink fabric for the Sweet Bonnie Top, but I wanted to tie the two pieces together more using the silver accent.  Since I had no silver fabric in my stash, this meant it was time to go shopping!

We headed to Joann's and combed the aisles in search of the perfect shade and texture of silver fabric. Finally, I came across this silver pleather.  I was a little concerned that it might not hold up well in the wash or to the rigorous play of an active little girl, but my choices for silver fabric were pretty slim, so I took a chance with it.  I tested a piece of it in the wash and it seemed to hold up just fine.

For the Sweet Bonnie Top, I used the silver fabric with no added interfacing on the collar, and I lined the back of the pocket using the knit fabric.  Check out my mad stripe matching skills at those sleeve shoulder seams! My mom taught me well!


The most challenging part of making this blouse was using the metallic thread to topstitch the collar and pocket!  I learned much later that there are specialty needles for sewing with metallic thread (still need to buy one), but I did manage to finish the entire project using a regular needle.  If you decide to give this a try with a regular needle, I'll just warn you that you might get frequent thread breaks that can be a little frustrating at times!

I love the raglan style of the Sweet Bonnie Top and the fact that it can be made using wovens or knits. Besides the peter pan style collar, the little pocket and the pleats at the sleeve cuffs, the back includes a zippered closure to help make slipping the top on and off a lot easier.  


I'm fairly new to sewing zippers into clothing (this was my second one and done the same week as my first one which I blogged about here).  It was very easy to do using the instructions and pictures in the pattern.

Next, I planned how to embellish the Tree Climber Trousers to make them perfect for Ella's style. I started by quilting the knees using the metallic thread and two layers of regular quilting cotton for backing.  In addition to working with the finicky metallic thread, I was also now working with stretch corduroy!  What was I thinking?!  


This fabric definitely required the use of my walking foot.  It was stretching and sliding/slipping all over the place until I stuck that on my machine.  Quilting the knees took a while, but the look it gives the pants was all worth it!  


I then constructed the front pockets by lining them with a coordinating quilting cotton fabric for a little peek of color.  I used the same fabric to make the inner waistband and to line the back pocket flaps.


For the back pockets, I used some double sided Wonder Tape to hold the folds until I could edgestitch since pins would have left permanent holes in the pleather.  Double sided Wonder Tape is a great product! You should definitely get some along with that sewing machine needle for metallic thread!


You might just notice that the back pockets on these pants are rather large.  In fact, I used the smaller pocket for the size 5 pants that I made Ella, and they are still that big!  Of course, you can always scale the back pocket pattern pieces down to suit your personal taste.


And since I wasn't feeling challenged enough, I decided to try my hand at inserting a zip fly for the first time EVER!  The Tree Climber Trousers pattern comes with pattern pieces and instructions for sewing a faux fly and a completely elastic waistband, but for some reason, I felt I had to do a real zippered fly!  The pattern instructions include a link to a couple of great tutorials (one by Melissa and the other by Shauna) on how to sew a zip fly and modify the waistband, so once I was completely free of any and all distractions, I was able to figure it out.  I'm so glad I did because I love, love, love the end result!


It may not be perfect--obviously it isn't since I sewed the fly shield so that the serged edge shows--but it functions and looks pretty darn good from the outside!


Now that all being said about how happy I am with the results of the zip fly, I didn't really consider that this modification would mean that all the elastic would now end up in the back waistband only and not be distributed across the front as well.  Because of this, the rear end looks a little more cinched than I think it normally would had I followed the exact details of the pattern instructions.

All I know is that I learned a few new tricks while sewing this outfit, tried out some new materials, and most importantly, made one little girl very, VERY happy!  


To learn more about Pattern Anthology and to purchase the 8 pdf pattern Winter Wonderland Collection which includes both the Sweet Bonnie Top and the Tree Climber Trousers, click HERE!

I was provided copies of these two patterns free of charge in exchange for my participation in the pattern tour, and all opinions expressed in this post are my own.

Be sure to check in with Andrea at The Train to Crazy, Kate of See Kate Sew, Melissa of Melly Sews, and Shauna of Shwin & Shwin each weekday through November 18th for links to all the bloggers participating in the Winter Wonderland Tour!  Or click HERE to see all the outfits already revealed.  You won't want to miss it!


I'd love to hear what you think of my Winter Wonderland outfit.  Please let me know by leaving a comment!

Follow on Bloglovin

Friday, April 19, 2013

More Lovely Rita's and a New Bimaa Top

Well, we've made it to the last and final day of Pants Week on sewVery.  I really appreciate everyone that's been following along.  That said, I hit a big milestone for the blog yesterday--200 blog followers!  And as of this morning, I am only 15 away from having 400 Facebook Likes!

So, I announced on FB yesterday that when I reach 400 Likes, I'll host a giveaway here on my blog.  I've got a couple of ideas in mind of what to give away, so please help me get those 15 Likes on Facebook by clicking sewVery.

Now, onto the pants.  Today's feature is another great pair of Shwin & Shwin Design's Lovely Rita's Skinnies.


I guess I can't say enough about how much I like this pattern.  This is my third pair, and they just keep getting easier and easier to make, especially with the pattern design changes that Shauna made to the revised version.

This flowered pair of Lovely Rita's is made using some bottom weight fabric from Joann's that has a bit of stretch to it.  The fabric isn't very thick--it feels kind of like a twill to me--and is ideal for this pattern.


I used the 5T size again, and as you can see, they appear looser than the Lovely Rita Jeans I showcased in Day 2, but the only thing I did differently to this pair is add the button flap detail to the bottom.  So, I think the thickness of the fabric definitely affects the overall fit of the pant.


On all three pair of Lovely Rita's I have made, I chose to fully line the rear pocket rather than fold and press under the seam.  I think it is just so much faster and easier to line it.  On the other two pair of pants, I did use a contrasting fabric, but this print has a lot going on, so I just used the same fabric for the lining.


One of the changes that was made to the revised version of the pattern was to make the waistband have elastic all the way around.  Now, I know what you are thinking, cause I thought the same thing. But the way the front of the pants is cut, there is very little gathering, so the pants maintain their flat front appearance and fit.  I think she made this change to help keep the fabric from bunching up so much on the top of the bum.  As you can see in these pictures, they are contoured to Ella's little tush, and the waistband is high enough in the back to prevent her underwear from peeking out when she bends over.


Ella loves the flowers on these pants and how comfortable they are.  The front pockets are functional but are mainly a design element, in my opinion, since they are so shallow.  She still likes having them to keep a Starburst on hand!


Ella is so happy I made her a Bimaa Top to wear with these Lovely Rita's, too.  This is the second Bimaa Top I've made using EmmyLouBeeDoo's Bimaa Sweater Pattern.  Here's the post to the first one.


I used ribbed knit with a bit of lycra or spandex in it for this size 5T purple/eggplant version.  The fabric is thicker than the fabric I used on the first Bimaa I made, but I think it works well still.  Again, as with the pants, the fabric type makes all the difference in fit.  Since this ribbed knit is a little thicker, the cowl neck is obviously thicker and bunches up more.  Also, even though I used the 4T sleeve length this time, the sleeves look a little long out of this fabric.  I'm not worried though.  It just means she can wear it again come Fall!


This sweater is amazingly simple to make, and the first Bimaa Sweater was the knit project that gave me enough confidence in sewing with knits to want to try other knit projects.  Sarah's website, EmmylouBeeDoo and her pattern have lots of helpful advice for using your serger to sew knits.  That information made a world of difference for me!  Thanks, Sarah!

And thanks to all of you who follow along on the blog and Facebook.  I can't believe how many friends I've made because of this blog.  I hope I get to meet more of you in person at Sewing Summit this year! Please recruit your friends to follow along on the blog and on Facebook, and when my sewVery Facebook page reaches 400 Likes, I'll host a giveaway!

Come back this weekend for a wrap up of all the pants I've made on the blog this past year and a half. You just might find something else you want to make!

Have a great day!

Veronica

Tuesday, April 16, 2013

New Lovely Rita's Jeans

Today I'm sharing with you the second pair of Shwin & Shwin Designs Lovely Rita's pants that I've made.


A while back, Shauna made some modifications and added sizes to the original pattern, and she asked me to test it out.  The first pair of Lovely Rita's that I made Ella are still one of my absolute favorite things I have ever sewn for her, so of course I jumped at the chance to make another pair.

First Pair of Lovely Rita's that I made

I made both pair a size 5T, but as you can see in the two pictures, the top pair (made using the revised pattern) has a skinnier fit.  I also omitted the button cuff at the bottom on that pair, giving them a more traditional skinny jeans look.

Obviously, I made these jeans a few months ago and never got around to sharing them on the blog. Today it's already in the 70's outside, so she definitely doesn't need a heavy coat now!


For this blue jean pair of Lovely Rita's, I used some medium weight denim with 2% spandex for a little stretch.  This fabric feels more like traditional store bought blue jeans while the black stretch denim I used for the first pair is a little thinner and softer.

The front pocket design stayed essentially the same and are really more decorative than anything since they aren't very deep.


The front of the jeans is flat with no gathers.  Also, Shauna made some slight changes in the pattern design which resulted in a better fit at the crotch.


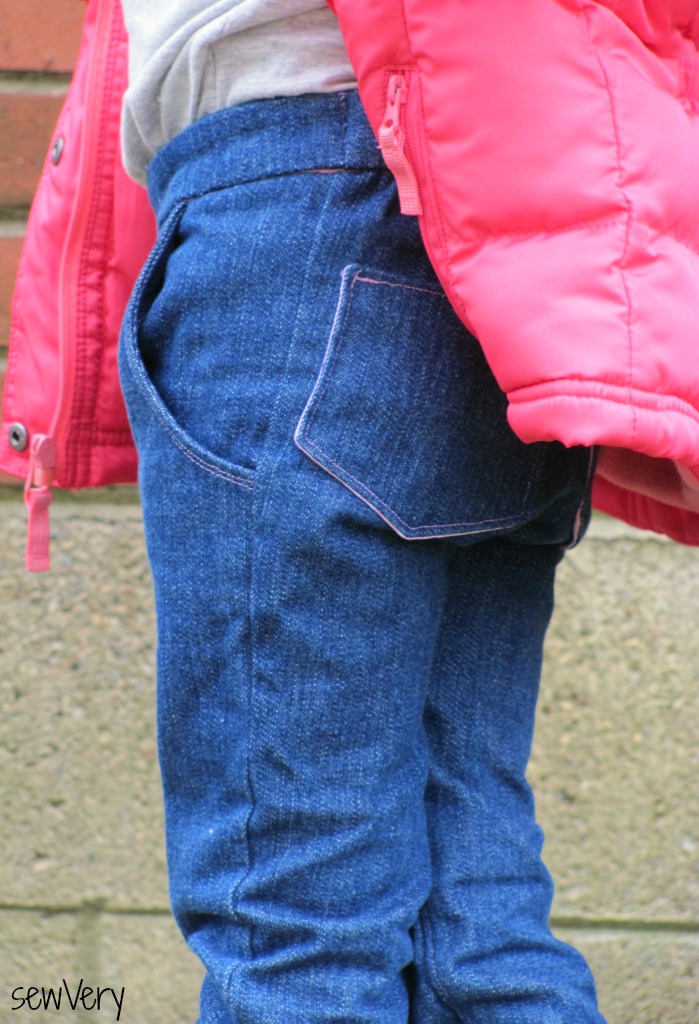
For the rear pockets, I cut out a second pocket piece in a different fabric (in this case a pink with white polka dots) and lined the pocket instead of hemming the edges.  I find this to be easier, plus it adds a little decorative interest to the jeans.  I also used baby pink thread to add a pop of color.


The way the back of the pants is cut makes the waistband sit a little higher which helps prevent the jeans from slipping down when she bends over or squats down.

All-in-all, these have been Ella's favorite jeans this year.  She gets compliments on them often, and I've even been told they look store bought.  So if you are looking for a great skinny pants pattern for your daughter, I highly recommend the Lovely Rita's pattern.  I think it even goes up to size 8 now!

See you back here tomorrow for the next installment of Pants Week here at sewVery!