I'm excited to be sharing my Girl's Halter Top Sundress Tutorial with you today!
My friend, Melissa from
Melly Sews and
Blank Slate Patterns (affiliate link), is hosting her ever popular series of 30 Days of Sundresses, and I get to play this year!
I had no trouble deciding exactly what sundress I wanted to make for this series. In fact, I've been wanting to make this halter sundress since earlier this summer when I participated in
Elegance & Elephants Knock-it-Off Series. You see, my Girl's Halter Top Sundress is my version of the
Halter Dress from Kelly's Kids, but I made it for a fraction of the cost!
For my Girl's Halter Top Sundress Tutorial, you can make a size 5T version using the measurements and details I have provided. However, you could easily make one in any size if you have a peasant top or pillowcase dress pattern in your child's size plus this
circle skirt tutorial from Made.
Here we go!
Download the
Armhole Cutout Pattern Piece (affiliate link). Fold the Front Bodice piece so it is now 15" x 9" and align the armhole cutout pattern piece straight edges with the open edges of the bodice (not on the fold). Trim away these pieces of fabric to form the armhole openings for the halter top.
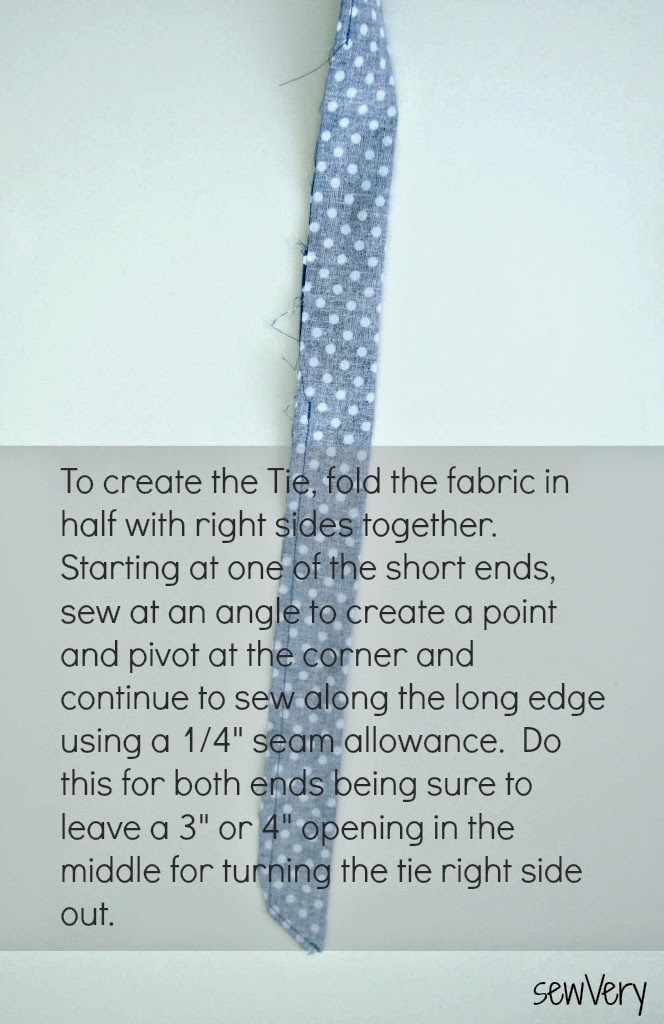
Next, finish the Tie by following the directions in the picture below, then complete the Back Bodice as described.
Before you press and sew the casing for the Tie on the Front Bodice, either hem the armhole openings with a 1/4" hem or trim the opening with bias tape. I did the latter. I cut strips of fabric 2" wide x 12" long for each side and pressed to make double fold bias. I then sewed each bias strip onto the armhole opening to encase the raw edge. Trim off any excess length of bias before proceeding.
Once you've finished the armhole openings, then create the casing for the Tie by following the instructions below.
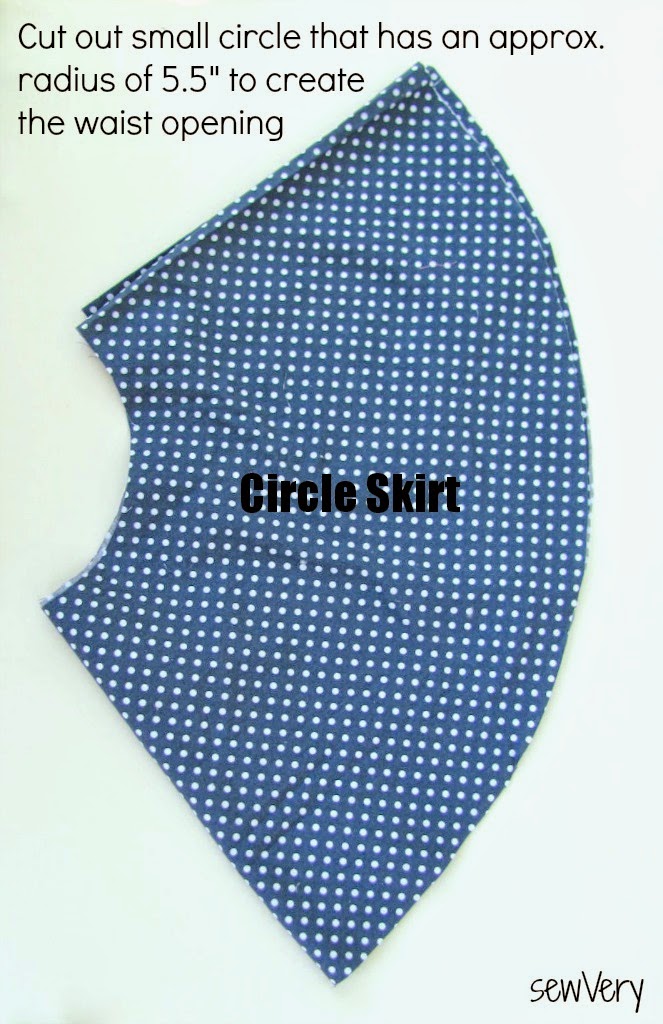
To create the skirt of the Girl's Halter Top Sundress for a size 5T, I used one yard of fabric. First, fold the fabric so the selvedges are lined up. Next, fold the yard of fabric in half so the length is now 18" long x the width of the fabric. You'll have a fold on the left and at the bottom while the top and right side are open. Now trim the excess fabric from across the top so you create an 18" x 18" square. Take your ruler and mark a radius of 18" from the folded corner of your box. Alternatively, rig a marking pen or pencil to a piece of string and mark the 18" radius by firmly holding the string at the folded corner while marking the fabric from the bottom right edge up and to the left to meet the top left corner of the fabric square. Trim along this line.
Using either method above, mark and cut out the fabric for the skirt top as instructed below.
If you choose to make a size other than the 5T, you'll need to determine the radius of the circle to cut out for the waist opening. To do that, wait until you've completely assembled the bodice, then measure the length of the front plus the back bodice at the bottom (this will be circumference). Take that number and divide it by 6.28 (which is 2 x Pi). The resulting number will be the radius of the small circle to cut out for the waist.

Now all that remains is to run the Tie through the Bodice casing and hem the skirt. I am not fond of pressing curved hems, so I opted to used a package of narrow double fold bias tape. It is very important to calculate the yardage of bias tape you'll need before you begin. For the 5T version like I made, approximately 113 inches or 3.14 yards of bias tape are needed.
And there you have it! A lovely Girl's Halter Top Sundress just perfect for twirling in the summer sun!
Ella loves wearing this dress, and I think it looks so feminine and sophisticated on her! She looks ready for Sunday brunch!
Thanks for stopping by today, and I hope you'll decide to come back again. I'd love to have you follow along through Bloglovin' (just click the button below) or any of the other social media links shown at the top right of the blog page. Also, be sure to check out my
giveaway and a special coupon offer for clothing size and care labels. Giveaway ends at midnight CST on June 18th.
And for more great, free sundress tutorials, follow along with the
30 Days of Sundresses Series at Melly Sews! Thanks again, Melissa, for inviting me!


.jpg)