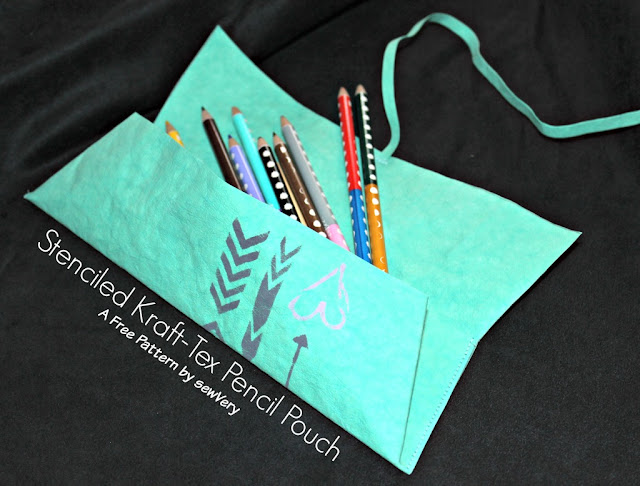
Someone recently gave my husband a leather pencil pouch with a tie strap that wraps around the pouch as a closure. I loved the simplicity of the design and thought it would be a great project to make with Kraft-Tex Kraft Paper Fabric instead of leather. Also, I wanted to make myself a more feminine pencil pouch using turquoise colored, pre-washed Kraft-Tex with stenciled arrows and heart designs on the outside. This Stenciled Kraft-Tex Pencil Pouch is one of the easiest projects I've made in a long time, and now you can, too, with my free pattern and tutorial!
Disclosure: The Kraft-Tex Kraft Paper Fabric and StencilGirl Products stencils were provided to me in exchange for my participation in this blog hop. All opinions are my own.
Keep reading below for details on how to download my free Kraft-Tex Pencil Pouch Pattern and to see the tutorial. Also, at the end of the post, find out how to enter a giveaway for a chance to win your own Kraft-Tex and stencils!
SUPPLIES:
- Download the Kraft-Tex Pencil Pouch Pattern from Craftsy (affiliate link)
- Cut 1 Pencil Pouch piece using Kraft-Tex Kraft Paper Fabric
- Cut 1 - 1/4" W x 20" L piece of Kraft-Tex for the Pouch Tie
- Thread
- Scissors
- Glue stick
- Sewing machine
- Rotary cutter, mat, and ruler
- StencilGirl Products stencil sheets
- Washi tape
- Make up sponge or stencil brush
- Acrylic paint
- Wet paper towel
- Paper plate
ASSEMBLE:
1. Print, cut, and tape the pattern pieces together. Lay the Kraft-Tex Kraft Paper Fabric flat and trace around the pattern piece with a pencil.
2. Cut out the fabric along the traced lines using scissors.
3. On the right side of the fabric, tape the StencilGirl stencil sheet in place on the Kraft-Tex using washi tape. Be sure to tape over any adjacent stencils and around the perimeter of the stencil you plan to use (circled in yellow below) to prevent the paint from accidentally be spread onto the fabric in an undesirable location.
4. On a paper plate, apply a small amount of acrylic paint. Dab a make up sponge in the paint and keep dabbing it on the plate until it is absorbed into the sponge. Press the stencil down firmly on top of the Kraft-Tex and gently dab the sponge onto the stencil to apply the paint.
I strongly suggest testing a stencil design on a scrap piece of fabric before stenciling on your actual item! It is important to learn the right touch needed to apply the paint properly so the paint does not bleed under the stencil. Your technique may vary from stencil design to stencil design.
After stenciling, carefully remove the stencil and check to make sure the underside does not have any paint that bled through. If it does, wipe it with the wet paper cloth and allow it to dry before using it again.
Reposition the stencil, if necessary, and repeat the stenciling process. If you are laying the stencil over a previously stenciled area, make sure the paint has dried first. I found that the paint dried very quickly on the Kraft-Tex.
5. Once you have completed stenciling the outside of the pencil pouch and the paint has completely dried, fold the bottom 1/3 of the pencil pouch up and finger press along the the fold as shown below.
6. Now fold the top 1/3 of the pencil pouch down over the bottom and finger press along the fold.
7. Open up the folds and bring the short beveled edge of the bottom so that it is parallel and even with the top fold. Push the excess fabric inward until the edge of the bottom piece is flush with the edge of the middle section. Hold in place and create an accordian fold. Repeat for the other side.
8. Use a glue stick to apply glue to the middle and bottom edges of the pouch as shown. Line up the outer edges and press together. Hold firmly until the glue sets. Repeat for the other side.
9. Sew along the edge using a 1/8" to 1/4" seam allowance to permanently secure. Repeat for the other side.
10. Cut out a 1/4" wide x 20" long piece of Kraft-Tex for the Pouch Tie.
11. Along the top edge of the pouch, use a ruler to find the center. Sew the end of the Pouch Tie to the center point on the wrong side (inside part) of the pouch flap. Use a zig zag stitch and go over the spot a couple of times to secure it in place.
12. Finger press all the folds again.
13. Wrap the Pouch Tie around the pouch two times and tuck the end under to keep the pouch closed.
View of the pencil pouch from the side.
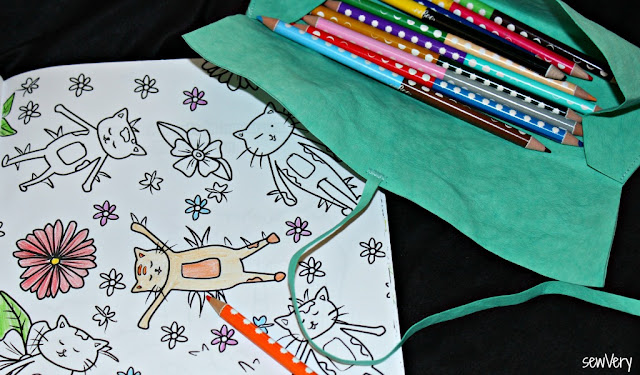
Enjoy keeping your pencils or art supplies in your awesome, new Stenciled Kraft-Tex Pencil Pouch!
These are so fast and easy to make, go ahead and make several at one time to keep on hand for other items like rotary cutters, scissors, coupons, or even a pair of reading glasses!
Want to win some Kraft-Tex Kraft Paper Fabric and StencilGirl stencils of your own? Then be sure to enter the giveaway from C&T Publishing and StencilGirl Products!
GIVEAWAY
One lucky winner will receive a $25 Gift Certificate to StencilGirl Products
AND a $25 Gift Certificate for C&T Publishing!!
Visit the fabulous designers in the blog hop and leave a comment.
The more blogs you comment on, the more chances you have to WIN!
(One comment per blog please.)
(One comment per blog please.)
You have until Saturday, February 18th at 11:59PM Central Time to leave your comments.
Winner will be announced on
StencilGirl's Facebook page and C&T Publishing’s Blog on Sunday, February 19.
StencilGirl's Facebook page and C&T Publishing’s Blog on Sunday, February 19.
Have FUN sewing!


Love this pouch! Thank you so much for the detailed instructions and pattern!
ReplyDeleteSuch a cute pouch. Thanks for the information. Good luck everyone!! angielovesgary2 atgmaildotcom
ReplyDeleteHow beautiful and useful! I love sewing pouches, and I will definitely try this. Thank you for the detailed tutorial!
ReplyDeleteNever thought of making a pouch for my reading classes. This is doable! THANKS!
ReplyDeleteGreat project for these snow days.
ReplyDeleteLove the pencil pouch! I need something like that.
ReplyDeleteMarilyn
How simple and useful! Love it! Thank you!
ReplyDeleteHow cool! Would lvoe something like this!
ReplyDeleteThis was fascinating! The envelope pattern is so interesting. I really want to try this and try this Kraft Tex. Thanks so much!
ReplyDeleteI have looked all over the kraft-tex site and I could not find the turquoise. Also looked on Amazon and the turquoise kraft-tex is not there either. Where can I buy it?
ReplyDeleteI contacted the manufacturer, and they only had a limited edition run of the turquoise. However, it was so popular, they will be restocking later this year (available in September). This is the link she provided for other colors still in stock from the limited run. https://www.ctpub.com/kraft-tex-web-exclusives.html
DeleteI absolutely love this pattern! So simple but so cute and clever...will definitely add this to my pencil pouch collection!
ReplyDeleteWell, this is a different idea for a pouch...and so easy to do!
ReplyDeleteWonderful pouch design and I love the combo of stencils!!
ReplyDelete<3 J
jwoolbright at gmail dot com
HerPeacefulGarden.blogspot.com
Great tutorial! Thanks for sharing.
ReplyDeletewonderful project, love it
ReplyDeleteLove the turqoise color - so nice! Liked your project! Thanks for sharing!! mumbird3(at)gmail(dot)com
ReplyDeleteYou didn't have to turn any corners - that was a problem
ReplyDeletein the previous DT's post as a corner tore. Your way
works much better. I'm assuming that when you say pre-washed
it came that way from the company. Thanks for giving
details on making the pouch. It is very pretty and I'll
be back for the pattern.
thanks for sharing.
This is a very nice project, nice way to make a pencil pouch!
ReplyDeleteI love the turquoise.
ReplyDeleteWonderful idea and gorgeous design.
ReplyDeleteThanks for this great project and your tip for testing the inks on a sample first is a good one to remember even for journaling.
ReplyDeleteI have to get this product! It is so versatile.
ReplyDeleteI love the turquoise color but that was a limited edition but they have a wonderful tangerine color(also limited), that is divine. Just might have to order it
ReplyDeletegreat finale from today's posts. thanks so much for sharing.
ReplyDeleteVery nice project. I think it is one I can make, not a great sewer! Thanks for sharing this. I love the turquoise!
ReplyDeleteGreat idea. (and beautiful end result!!) Inspired!
ReplyDeleteI love the pencil case. Great color and image.
ReplyDeleteWhat a great idea! An artful pouch for art supplies!
ReplyDeleteSuper cute!!! I'd love to make something like this for my daughter to store her art pencils.
ReplyDeleteGreat idea, now I know what to do with the Kraft Tex that I have. Thanks!
ReplyDeleteThank you for sharing this beautiful project.
ReplyDeleteAlways looking for storage ideas...this is great! Thanks!
ReplyDeleteI'm loving this Craft-Tex paper. This is my first intro to it and I think I need some, NOW!
ReplyDeleteWhat a pretty turquoise!
ReplyDeletegreat design and layout thank you for your contribution to the blog hop
ReplyDeleteGreat detailed instructions! Your stenciling added a lovely touch!
ReplyDeleteNifty little pouch! And seems so simple with your great tutorial:) Thanks so much for sharing.
ReplyDeleteVery clever! Have to try this--there is always a need for more pouches!
ReplyDeletealhrobkin (at) aol (dot com)
Love this idea! Very cute pouch.
ReplyDeleteI have lots of crafty friends who would love these as gifts! Thank you for the great inspiration!
ReplyDeleteFun project! I love the color!
ReplyDeleteAwesome pouch! Make wonderful gifts.
ReplyDeleteSo pretty!
ReplyDeleteGreat result, thanks for the practical tips too.
ReplyDeleteWhat a great pouch! Thanks for the wonderful step-by-step tutorial and for all your helpful "how to" stencilling and sewing tips!
ReplyDeleteNice pouch for any special gift. Thanks for the pattern
ReplyDeleteVery fun project!! I especially love the cat. :D
ReplyDeleteI'm loving the Kraft-ex. This pencil case is so cool.
ReplyDeleteReally pleased to have finally been able to download this project. Thanks for the template.
ReplyDelete