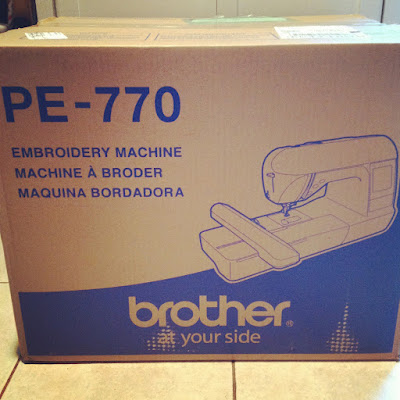
What was I thinking?! Days before I left to go to the Sewing Summit, I ordered a Brother PE770 embroidery machine off of Amazon.
I had debated the idea of purchasing an embroidery machine for some time, but it was my friend Lila's oohing and aahing over a couple of "stinkin' cute" reversible dresses that my friend RaeAnna (of Sewing Mama RaeAnna) appliqued for me that pushed me over the edge! Before I knew it, I was researching machines and placing an order! I had no idea what I was getting myself into! Ha!
It was at least a week after I returned from my trip before I could really try out my new "toy", and things didn't go so well at first. During my test run of the new embroidery machine, the upper thread wrapped around a small piece of felt that is attached to the bobbin case with some adhesive on the back. Of course the machine jammed, and I had to take the metal plate off just to clean out the mess. The little piece of felt was now not so sticky anymore and several more similar failures occurred.
At the time, I really had no idea what was the best stabilizer to use with cotton quilting fabric or knit fabric. I asked the ladies at the embroidery machines at Joann's and was directed to a package of tear-away stabilizer. I'm sure tear-away stabilizer works well for some applications, but I did not like it!
After discussing these issues with RaeAnna several more times as well as consulting numerous online resources and a Facebook embroidery group, I decided to try some of the Pellon #40 cut away stabilizer. I also took a little Elmer's stick glue and stuck that little felt piece back down to my bobbin case (because the Brother authorized service rep said it would be at least 3 weeks before he could even look at my machine). After making these adjustments as well as tightening the bobbin screw about an eighth of a turn, I finally had success!
I made a couple more test runs and then made my daughter this cute little t-shirt! My first appliqued item! Yay!
Now my friend Lila had a friend who wanted me to make her granddaughter a similar "stinkin' cute" little reversible dress. After exchanging emails and pictures of fabric and applique designs back and forth Monday morning, this is what I made...
Don't you just love this little turkey? I used Joel Dewberry's Heirloom fabrics for the appliqued feathers.
Covered button for the closure on the back using more of the Heirloom fabric.
And for the reverse side of the dress, we have a cute elf shoe filled with a lolly pop and candy cane. I just love the soft pink and green colors! Don't you? The shoe fabric is the green on green chevron from Riley Blake Designs.
Covered button for the closure on this side of the dress as well.
I know I still have a lot to learn, but I was extremely pleased with the end result. I certainly hope that little Lucy will enjoy her new dress as much as my daughter and Lila's daughter have enjoyed theirs! Thanks again, RaeAnna, for all your help! I hope I'll eventually be able to embroider as well as you!


It's a learning process for sure! Make sure to use 2 sheets of stabilizer each time. I've learned that's the "rule of thumb". Especially with jersey. I've also heard of using a piece of tear away stabilizer on top of jersey. And always think about your needles. Jersey? Ball Point needle. Denim? Denim heavy weight needle. It's the same as sewing. Changing needles frequently. I've got some embroidery "tutorials" on my blog... like doing those plush baby blankets. I actually use saran wrap on top. I ordered a bolt of Tear Easy Sulky Stabilizer and using 2 sheets I never have problems. If your stabilizer wasn't Sulky then you may want to try that before you give up, because it really is good stuff. People rave over the "stick on" stuff and that is not strong enough unless you have heavier fabric, sometimes I will use it. Anyways, I know you have some good sources, but if you have questions, then let me know!
ReplyDeleteSo cute! I want an embroidery machine so bad. Maybe Santa will hear my plea, lol. I would love to do all this. You did a great job and didn't give up. My patience with machines is not so good. Happy Sewing!!!
ReplyDeleteSo... You're very lucky!!! Congrats for the new machine and what a beautiful dress!!! Bisous
ReplyDeletehttp://ellecrafts.blogspot.com ( from the diy dreamer linky )
Beautiful results!! The dresses are awesome. Maybe someday I'll be able to afford a machine like that and make some beautiful things.
ReplyDeleteCute! I have embroidery on my machine and never use it. Shame on me!
ReplyDeleteAWESOME!!!! Your dresses are SO STINKIN CUTE! lol! It looks super professional and your trimming is perfect!
ReplyDeleteWow! It looks like after some trial and error you got great results. I want an embroidery machine. I'll have to refer back to this when I get one, so I'll know the best stabilizer to use. :)
ReplyDeleteBeautiful results!! The dresses are awesome. Maybe someday I'll be able to afford a machine like that and make some beautiful thing.
ReplyDeleteVery nice post. I really enjoy the reading. I come here from the google while searching for some good blog.Thanks
ReplyDeleteBest of luck for your new machine. Brother PE770 embroidery is a great machine and good choice for embroidery. Thanks.
ReplyDeleteI salute your choice of choosing Brother PE770.. one of the best machine to work on. Thanks.
ReplyDelete