home tutorials features parties custom orders

Thursday, July 12, 2012

Pleated Penny Pattern Tester


Two weeks ago, I had the opportunity to be a pattern tester for Shauna of Shwin & Shwin.  I saw her post on Facebook at just the right time (I usually see these sorts of things way too late) and immediately messaged her that I was available to test out her latest pattern creation, the Pleated Penny.

Here's what I made...


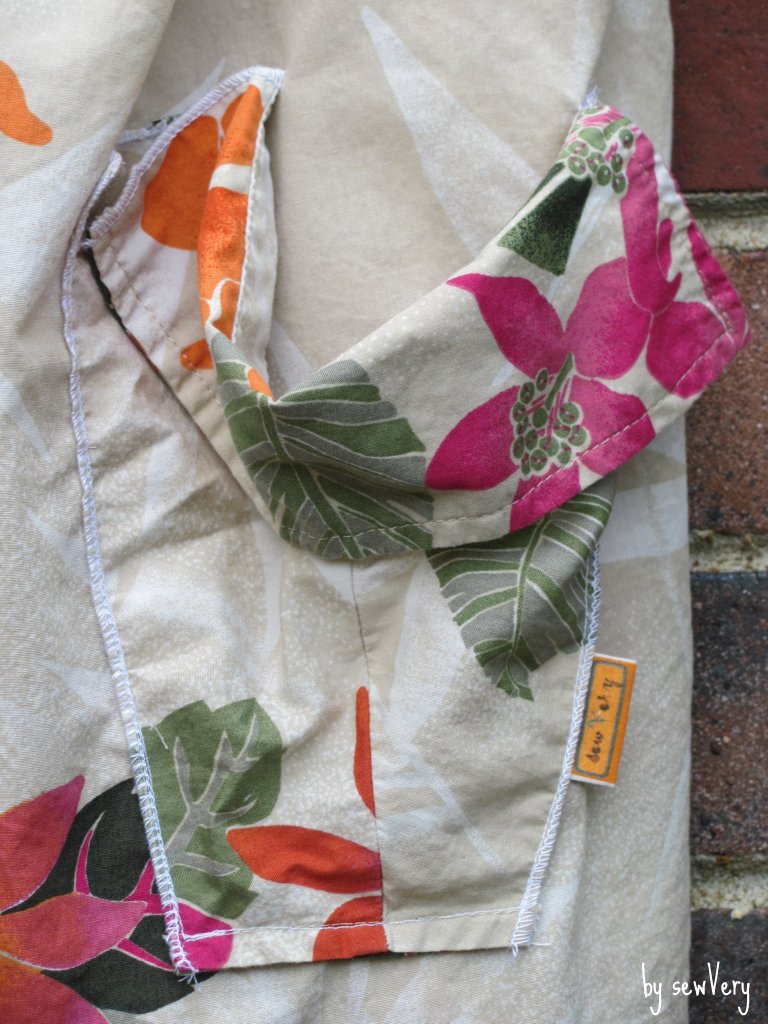
I actually made both a top and dress, both of which she includes the instructions for making in the pattern.  The look of this top/dress is so sweet and playful, and when worn with the optional belt or sash, it transforms into a sophisticated outfit.


The top/dress has a pleated neckline, hence the name Pleated Penny, that sits high on the chest.  The pattern calls for the button closure, but as you can see on the top I made, I changed it up a bit and sewed on tie straps instead.  I like this pattern made both ways, and with the ties, I believe Ella could wear the top in the fall/winter with a long sleeve t-shirt underneath.  


I made a lot of pictures, so I might as well share most of them with you all here.


As you can see, she has become quite the poser lately!  She really has been so cooperative in all my requests (demands) that she dress up for photo shoots.


Since I tested the pattern, I'm not exactly sure what changes may have been made to the final version, but I can't imagine that Shauna had to make any major modifications.  Most of my comments had to do with clarifying where to make the pleats and exactly where to attach the straps for the buttons.

I'd definitely recommend this pattern to anyone with advanced beginner to intermediate sewing skills.  Both pleats and buttonholes can be a bit challenging if you've never attempted them before (or even if you have)! Again, this top/dress pattern offers a more sophisticated look to a little girl's style, and I liked the fact that it was so different from the typical pillowcase or peasant style top/dress that is so prevalent for little girls.


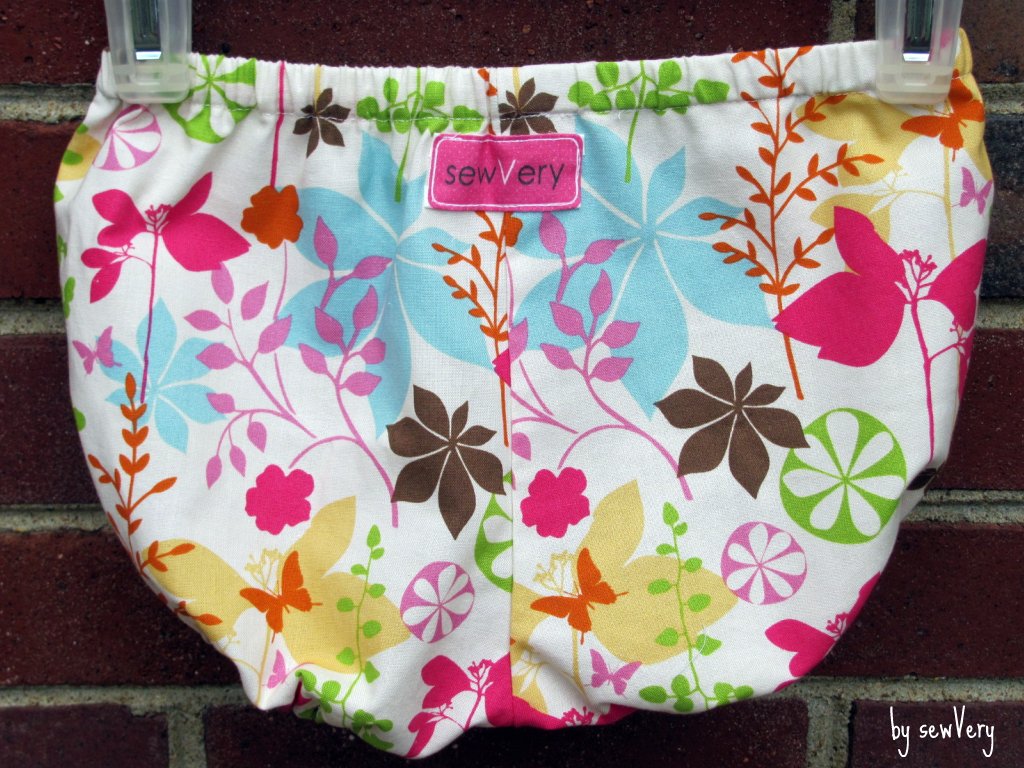
Ella has really enjoyed wearing both pieces, especially the top.  It's cool, comfy, and is great for playing in. I used a 20" piece of Joel Dewberry's Blockprint Blossom in Blush from his Heirloom collection to make the top.  I love this fabric and the entire collection.  This top goes well with any style short, too.  I made the denim shorts last year and the seersucker shorts last month for the Shorts on the Line event.  I've got a tutorial for them here.


Ella wanted the dress to be orange, so we found this piece of fabric in my stash.  To make the belt stand out more, I sewed a piece of ribbon to the center of it.


If you are interested in making this top or dress for your own beauty, then you are in luck.  Shauna just released the final version of the Pleated Penny pattern in her shop, and to celebrate the release, she is offering 40% off all her patterns through Friday, July 13th!  Just use the code PENNY at checkout. What an awesome deal!  You really should head over and check out all her other great patterns, too.

I've been eyeing her Lovely Rita's Skinnies which are a slim leg pant for little girls.  I'll definitely be trying this Shwin & Shwin pattern out next!

Lovely "Rita's" Pattern.  Photo by Shwin & Shwin
I hope I get to test out new patterns for Shauna again in the future!  Thanks again.  Happy sewing everyone!

Wednesday, July 11, 2012

Scalloped Edge Shorts Tutorial


I was recently a guest over at Small + Friendly for the Shorts on the Line summer sew along where I shared my tutorial for making Scalloped Edge Shorts.  I'm reposting the tutorial on my site in case any of my followers missed it.  I'll also have it listed under my Tutorials.


First, find a pattern for a basic pair of shorts.  I used Butterick B4503 View E.


As in my example, I cut the shorts out exactly according to the pattern; however, if you want the finished shorts to be the original length specified in the pattern, you'll need to make adjustments to the leg length by removing approximately 1.5" - 1.75" at the leg opening.  This length will then be added back on when you attach the scallop edge.

Pink Scalloped Edge Shorts & Halter Top


Today I'm sharing with you the pink scalloped edge shorts I made using the tutorial I put together for the Shorts on the Line summer sew along.  I also made Ella an adorable coordinating halter top to wear with them.


For this pair of scalloped edge shorts, I decided to make the scalloped edge using a coordinating fabric.  I really like the combination of polka-dots and stripes together, don't you?


I used the same pattern as before, Butterick  B4503, size 5 to make the shorts, but this time I shorted the length of the shorts in the stride as well as at the leg opening.  As a result, I think this pair of shorts is a much better fit for Ella right now.  The original seersucker pair I made fits well, but I thought they were a little high waisted and longer in length than I had originally wanted.


Because I couldn't find a top in Ella's closet that really went well with them, I found this black, pink, green fabric in my stash that matched the shorts perfectly and started making the halter top, View A, Size 5, from the same pattern.  This pattern really is fast and easy as the cover suggests.  It only took me about an hour to hour and a half to make the halter top!


The halter top was a breeze to sew together.  It's completely lined, using the same polka-dot fabric, and could be reversible if I removed the bow.  In fact, there are only two things I did differently from the instructions: I top stitched all around it, and I made a bigger bow.


If I were to make this halter top again, which I might, I would most definitely add some length to it (maybe an inch to inch and a half).  Ella was worried that her belly would show!  I should have known to do this because I made the View B top last year for her and had the same issue of it being a little on the short side.  I guess I should start making notes on my patterns about fit for future reference!


I am very pleased with how this little ensemble came together!  It is one of my favorite summer outfits so far. If you are looking for a quick little outfit to make your cutie pie, then I'd highly recommend trying this Butterick pattern.  

Oh, I even had one of my tags in the perfect color combination for the outfit. I like having labels in a variety of colors!  I think it's sewVery fun!


Thanks for stopping by today!  I've got more shorts and outfits to share with you all this month, so be sure to stop back by soon!


Tuesday, July 10, 2012

I'm Guest Posting for Shorts on the Line Today


Have you checked out the great summer event called Shorts on the Line hosted by Imagine Gnats, Designs by Sessa, and Small + Friendly?  If you haven't yet, you should!


shorts on the line button

I'm guest posting there later today about these cute scalloped edge shorts I made, and a tutorial I put together so you can make some, too!


A few weeks ago, I had just purchased a load of fabric for a steal at my local fabric store's semi-annual sale when I saw the cutest Oliver + S scalloped edge skirt hanging in the window.  Sadly, they didn't have the patterns in yet (not that I had any money left to buy one that day), but I looked it up as soon as I got home and decided I would eventually purchase the pattern (still haven't though).

In the mean time, my friend Rachael at Imagine Gnats invited me to be a guest blogger for the Shorts on the Line sew along.  Immediately, I knew I wanted to make my own scalloped edge shorts, and I decided to make a tutorial on how I did it in case anyone else wanted to make a pair too.

Here's the pair of scalloped edge shorts I made for my guest post at the Shorts on the Line sew along.  These are great little shorts that add some cute variety to an otherwise plain pair of shorts.

Ella really has enjoyed wearing hers--even in 102 degree heat!  She was quite the trooper the day we took these pictures, and she didn't even complain a single time.

Here she is in her 4th of July look with the scalloped edge shorts...


And here she is with her cupcake top and scalloped shorts on.  I think she's ready for a party or at the very least ice cream and cake!


And the last look of the day, just having a casual stroll looking at beautiful flowers!


I made the cupcake top and the last top, too, called the Pleated Penny. Check back soon because I'll be blogging about those tops and how you can make those, too!

Don't forget to check out all the other great shorts ideas this week and next at Shorts on the Line!

Tuesday, July 3, 2012

A Baby Gift--A Year Late!


A few days ago my husband reminded me that we never gave his co-worker a baby shower gift last year when his daughter was born!  I have no idea why we never bought his little baby girl a gift, but we thought it was better late than never to deliver one now.

Since it was a baby girl, I decided I would try and whip up a cute little peasant dress and matching bloomers.  My husband actually asked his co-worker what size the little girl is wearing now--not a conversation you hear very often between men--and according to my husband's intel, the one-year-old is already wearing a 2T!

So, I searched through my growing collection of patterns and found this cutie that includes an A-line top and pair of bloomers--a vintage 1960's pattern, Simplicity 6990--and the copy I have is actually in a size 2!

Simplicity 6990 Girls 1960s Sundress Pattern in Two Lengths with Panties Simple To Sew Jiffy Childrens Vintage Sewing Pattern Breast 22

This is the only bloomers pattern in my collection, and since it was in the correct size, I went with it, but I decided I could make a peasant dress much faster than this A-line dress with facings and all.  I'll tackle making this top another day!

Anyway, I love how both pieces came out.  I hope they fit!


Back
Front


And since this week was the start of the Shorts on the Line event, I've now got one pair of shorts to hang on the line!


This time next week, I'll be guest blogging for the event over at Small + Friendly.  I've got a really cute pair of scalloped edge shorts to share with you, plus a tutorial so you can make your own!  Make sure you follow along and find some inspiration to make a great pair of shorts!  I might just make a few more shorts for Ella this month, too!


shorts on the line button

Friday, June 15, 2012

Shorts on the Line Summer Sew-Along


Hi, everyone!  I've been out of town for an entire week visiting some family and friends, and now that I am back, I wanted to let you know about a fun Summer Sew Along called Shorts on the Line!  Some great ladies over at Imagine Gnats, Designs by Sessa, and Small + Friendly have put together this exciting event that will begin in early July.  To learn about all the details, including the guest bloggers and of course, prizes, please go here.

shorts on the line button

And guess what?!  I'll be one of the guest bloggers!  Yay!  I've never been a guest blogger for an event like this one, but I'm super excited that my good friend, Rachael, from Imagine Gnats asked me to contribute.  

Now that I am back home, I've got to find the time to make some shorts!  Are you with me?!  Hope so, and I hope I'll see you over at the Shorts on the Line Flickr group next month.  

I've got a couple of cute ideas bouncing around in my head that I hope I can successfully convert into a pattern and then some adorable shorts. We'll see what happens come July 10th when I am scheduled to blog about the shorts I make.  Check out Shorts on the Line to see the full line-up of bloggers for the event.  

See you soon!

Thursday, June 7, 2012

Men's Shirt to Pillowcase Dress = Worthy Cause


At the start of the year, I read an article on MSNBC.com about an organization called Little Dresses for Africa.  Some of you may have heard about this cause and may have even contributed a dress or two to it before. Anyway, I was so touched by what I read that I decided to make a few dresses to donate.  I figured I would help some beautiful little girls feel special with a new dress and fulfill my need to sew!

I had a small stack of men's dress shirts that I was going to donate to Goodwill, but I saw an opportunity to upcycle these shirts into some cute pillowcase style dresses for this cause.  At the time I started making these dresses, I was new to the upcycle/repurpose idea.  I decided I wanted to transform these men's dress shirts into pillowcase dresses using as much of the original shirt as possible in order to minimize the waste.

The first one I made is still my favorite.  I used a solid blue button down dress shirt and sewed the front button placket together so that the buttons are purely decorative and not functional.  The tie is made from the shirt sleeves, and I made up this neat detail for the ends of the tie by sewing the sleeve cuffs to the ends.  For this dress, the only thing I didn't use was the shirt collar!  I've had a hard time convincing my daughter that we need to donate this to a little girl in Africa that doesn't have a dress instead of keeping it!


The next dress I made I actually used a sleeveless women's top that I picked up at the Goodwill Outlet store.  I paid pennies for the shirt.  I started off the same way as the first dress by sewing down the button placket.  I then removed the collar, cut it in half, and then sewed each half onto the dress as a pocket.  Because there were no sleeves, I had to use a ribbon for the tie at the neck.  Absolutely nothing was wasted!  This has to be my second favorite!


The third and fourth dresses were made using two cotton plaid short-sleeved men's shirts.  I didn't do anything fancy with these.  Just pretty basic pillowcase style dresses.


The fifth dress is where I spent a little more time and used every part of the shirt but the collar.  Again, I used a cotton plaid short-sleeved man's shirt, but this time, I made a cute little ruffle to sew on each side of the button placket.  I even made the tie out of the shirt along with a simple matching headband using a piece of the shirtsleeve and some elastic.


The final dress I've made so far was fashioned from a piece of shirting material that I had previously used for something else.  It is pretty plain except I did add a large pocket to the front.


Now I'm ready to ship these dresses off to Margaret Andrade in Florida.  I contacted Margaret a few months ago after I had made three or four dresses. She had contacted some other sewers/bloggers and asked them to get the word out about the Little Dresses for Africa cause and her personal mission to help collect at least 50 dresses that she would send all at once to the organization.  If you'd like to help Margaret and inquire further about her mission, you can contact her at margaretandrade@hotmail.com.

Margaret has been so friendly and helpful in finding out if Little Dresses for Africa would accept the dresses I've made since they have buttons on them and were made from used clothing.  What we learned is that as long as the buttons aren't functional, then they are fine (that is why I sewed the placket's together).  And as long as the used clothing was refashioned into a dress, it is acceptable.  Yay!

So, if you like to sew or just like to help others in need, I hope you'll consider contributing in some way to this worthy cause.  I believe every little girl should own a dress to spin around in!