home tutorials features parties custom orders

Monday, October 8, 2012

New Friend and Old Friend Collaborative Project


Several weeks ago, I made a new friend, RaeAnna, and she likes to sew and blog, too!  Yay!  Oh, and she has two adorable children, one of which is my daughter's age.  We've managed to get together for play dates almost every week now for the past couple of months.  I've thoroughly enjoyed getting to know her and chit chat about our favorite blogs, patterns, and current sewing projects.

Please go check out RaeAnna's blog, Sewing Mama RaeAnna, and see all the fun outfits she's been making lately and exciting projects that she is working on. Here are just a couple of examples...

Photo Credit:  Sewing Mama RaeAnna

Photo Credit:  Sewing Mama RaeAnn
Her stuff is just precious!  RaeAnna has an embroidery machine, and lately, she's been very busy with custom orders, including a couple for me!  We'll get to the details of this in just minute...

I also recently visited with my life-long friend and college roommate, Lila, who has the cutest little girl, Murfee.  You may remember reading my posts a few weeks ago about the Oliver + S Popover Sundress and the Summer Fun Dress Version 2 that I made for Murfee.

Well, Lila showed me this adorable reversible A-line dress that has a Halloween applique on one side and a Thanksgiving applique on the other, but now this dress is too small to fit Murfee.

Dresses by Kelly's Kids
Lila wanted to know if I could make her a similar dress but in a larger size.  I could sew the dress (super easy) but since I didn't have an embroidery machine, I couldn't make the appliques.  However, my new friend, RaeAnna, could do the embroidery for me (I hoped)!  

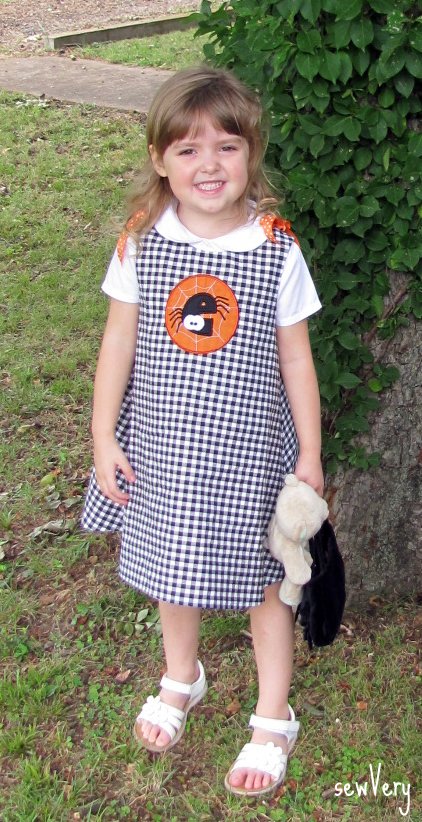
When I spoke to RaeAnna, she was just as excited about this project as me! Whew!  RaeAnna already had the cutest ever Halloween applique that takes the first letter of your child's name and turns it into a spider.  So that one would definitely be the one we would use for the Halloween side of the dress on some black with white check fabric that I already had stashed away.


Next, we needed to pick out a turkey for the Thanksgiving day side of the dress.  RaeAnna forwarded to me several turkey applique pictures to choose from, and after changing my mind a half dozen times, I finally went with this one.  I had RaeAnna use some of my Joel Dewberry Heirloom fabric for the turkey feathers.  The thread she used matches perfectly!  I just love it!


I already had some orange with white polka dot fabric and some orange cotton gingham in my fabric stash, and luckily, there was enough to cut out a 24 month dress for Murfee and a 5T for Ella!  This project was moving right along.

For the dress, I used my Cottage Mama Janey Jumper pattern and modified it slightly so that the closure is at the shoulder seams instead of at the back.


The reason for this was so we could add cute ribbons at the shoulder (the ribbons have a buttonhole sewn in them so that they fit over the button).


Now, I am not a big fan of making buttonholes, so in the future, I will be making the dress using the original pattern design for sure!  I've found that I really like the dress just fine without the ribbons, but that is just my preference.

RaeAnna was so sweet to accommodate my schedule, and she finished all four appliques in less than a week's time!  Here are some pictures of her machine in action.


Photo Credit:  Sewing Mama RaeAnna
After I picked the dress panels up from her, it took me roughly a day to sew both dresses.  I would have been done in about a half day if it hadn't been for those buttonholes!  I'm not sure if it is me or my machine, but I have trouble getting the buttonhole stitches to look consistently nice and neat.  If you've got suggestions on what I should do to improve my buttonhole making skills, please let me know!

Here's Murfee's dress:


And here's Ella's dress...


Ella and Murfee love their new dresses, and Lila, RaeAnna, and I do, too!  It was so fun collaborating with friends to make these adorable outfits for our daughters.  


It was so much fun, in fact, that I just ordered an embroidery machine for myself!  A Brother PE770.  Where or where am I going to put this thing!?  

Now Lila has friends and co-workers requesting a similar dress, so I guess I better figure out how this thing works--fast!  I am taking orders for Thanksgiving/Christmas dresses if anyone is interested!

Thursday, October 4, 2012

My First Washi Dress


A few weeks ago, I joined the Made by Rae Washi Dress Pattern craze!  I just couldn't stand it anymore.  I mean, I loved the look of the dress the very first time I saw it, but I don't normally sew for myself or spend that much money on a pattern!  That is until now!

Everywhere I looked, people were posting their pictures and blogging about their versions of the Washi dress, and there are no telling how many times I kept visiting Rae's Washi pattern page and Flickr group to mull over the idea of whether or not this dress would be something I could successfully make for myself.  I don't remember which post or picture did the trick for me, but I finally couldn't stand it anymore and ordered the pattern!  So glad I did!


I read through the instructions, took my measurements, and determined my size.  Next, I picked some Lisette sateen fabric from my stash that was enough yardage to make the dress version with sleeves.  Then I began printing, taping, and cutting out the pattern pieces.  Now I will say that is one thing I don't particularly like about pdf patterns for adult clothes--there are so many pieces of paper to put together.  After this laborious task, I cut out the fabric and began the fun part:  sewing!

Things progressed pretty quickly with sewing the pieces together.  Rae's instructions were spot on and her hints/tips were very useful.  I definitely suggest that you read through the entire set of instructions before beginning to make sure you are familiar with what comes next!

Since I already know how to shir, that wasn't a big deal at all.  What did slow me down was pinning on the sleeves and then attaching the bias tape around the armholes.  I'm not sure if I didn't  cut out my bias tape to the correct width to begin with or if I didn't iron it to the instructed width, but when I edge stitched it around the armhole opening, I thought the seam width was way too wide.  I'm pretty sure this was an error on my part somehow and had nothing to do with the instructions, so in the end, I ended up removing the bias tape and redoing the work using a smaller seam allowance.  I was much happier now!

I finished sewing the dress in an afternoon and wore it the next day.  If you are like me, when you get something new you want to wear it right away!  I love the look of the dress on, and I received so many compliments (from both men and women) the first time I wore it!  Plus, it is super comfy!


Since this was my "test" dress, I decided there were a few things I wanted to slightly alter for the next version (and yes, I immediately knew there would be many more dresses and tops made using this pattern).

  • First of all, I am not crazy about facings, and although the facings for the dress work well, I decided I wanted to line the top next time.  Lining the top would also eliminate the need to use bias tape around the armholes.  Plus Rae has a video tutorial for how to go with the lining option.  
  • Secondly, I wanted to lower the dart for the bust by at least a half inch to give me a better fit.
  • I also felt like the back was trying to ride up some because the shirred back was sitting a little high on me.  Next time, I will shift the rows of shirring down by at least a half inch if not more.
  • Lastly, the neckline of the dress seems to gape open more than I would like.  I'm not sure yet how to resolve this, so if anyone has a suggestion, please leave me a comment!
Curious about Ella's dress?  I'll be blogging about it soon!
Overall, the Washi Dress pattern is well worth the investment.  The instructions were clear and helpful, and the dress itself was fairly simple to sew.  Always a plus in my book!  I can foresee me using this pattern for years!  Thanks for a great pattern, Rae!

Wednesday, October 3, 2012

Joann Fabric & Craft Stores Girl's Night Out Event and Contest


This time next week, I will be frantically trying to pack my bags for the Sewing Summit in Salt Lake City!  I'm so excited that I get to attend!  I first mentioned the idea of going to the Sewing Summit to my husband sometime last November/December, and as soon as they announced the dates of this year's conference, he suggested I go for my birthday.  I sure do love him!

I then met Rachael of imagine gnats by way of winning a contest on See Kate Sew.  Soon afterward, Rachael and I decided we would room together at the Sewing Summit.  We've been sharing our excitement about the upcoming event all year long, and I can't wait to finally meet her in person!  Along the way, we've picked up a couple of other notable bloggers that we will be rooming with as well--Sara from Sew Sweetness and Lindsay from Lindsay Sews.  So looking forward to meeting them as well!

Which leads me to the topic of this post.  My lovely roommate, Rachael, forwarded to me information on this awesome by invitation only Girl's Night Out event that Jessica from Me Sew Crazy put together.  Of course I jumped at the chance to attend, and I can't wait to meet and chat with all the wonderful women who will be at the dinner!  I hope to learn a thing or two about sewing and blogging from them all, and maybe, just maybe, I'll have something insightful and useful to share with them as well.

 
Joann Fabric & Craft Stores (I shop there often, don't you?) will be sponsoring the Girl's Night Out dinner as well as Pellon, Michael Miller Fabrics, Coats & Clark, the Fat Quarter Shop, and The Ribbon Retreat.  From what I understand, they have all offered up some wonderful items to be handed out to the attendees as swag at the event!  Yeah!

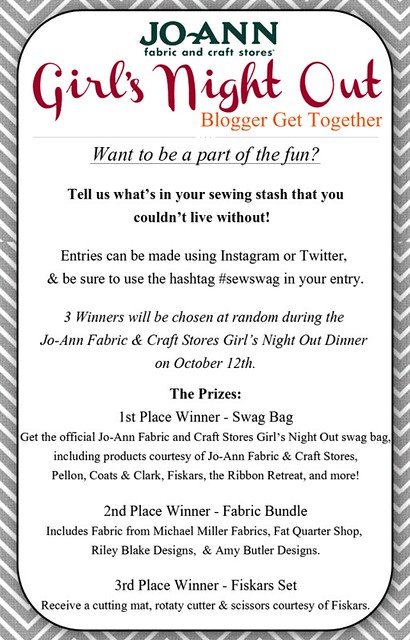
Not everyone can attend the dinner, but everyone does have a chance to win some terrific swag from the generous sponsors!  Here's how...


How awesome is that?!  If you don't use Instagram or Twitter, just head over to Me Sew Crazy and leave your comment on the contest post for an entry and to read the fine print on the contest rules.

Want more Joann Fabric and Craft Stores Girl's Night Out fun?

Follow along on Twitter and Instagram to see live tweets and photos before, during, and after the event using the hashtag #getinonthefun.

Good luck!

Wednesday, September 26, 2012

This Time I Get a New Dress!


You read that right!  I made myself a new dress this time.  The way I figure it, Ella has a closet full of cute things, and I am way over due for something handmade to be hanging in my closet!  Check out what I call V's New Blue Dress!


Also, in a few short weeks, I will be headed to the Sewing Summit, and I wanted to participate in the Travel Handmade series for the conference. People are making all sorts of handmade goodies to bring along to the conference, including new clothes, handbags, travel bags, make-up bags, name tags--you name it!

Travel Handmade with The Sewing Summit

I don't usually sew clothes for myself--at least not successfully--but I wanted to give it another go and see if I could whip up something cute and comfy to wear.  As I told my family, the worst thing that could happen is that I would end up with a new nightgown instead of a dress!

I made the dress using Simplicity 2031.  I've had this pattern in my collection for a while now, but I've never had enough fabric to make it.  You see, I usually shop for fabric with no specific project in mind, so I normally purchase a yard or two of fabric that I find pretty.  Well, a couple of yards just wasn't enough for this dress.  It took nearly three yards to make this beauty!


I ended up using some super soft cotton Lisette fabric that I found on the clearance aisle at Joann's.  I really hated to spend too much on the fabric since I wasn't sure it would even fit well!  With the great sales they usually have going on at Joann's, I was able to purchase the yardage I needed for under $10!


This pattern was very simple to make as the cover of the pattern suggests.  I took my measurements and followed the sizing guide on the back (all the while trying not to get upset that the size pattern I needed to use was larger than my normal store bought clothing size)!  Total time to make it was under 3 hours.

This dress, or caftan, is so comfortable to wear!  The skirt part is made using three panels so the skirt part has a seam down the center back and one between the center front and sides.  Hidden pockets are sewn into these front skirt seams.  I love pockets!  Don't you?

Ella's wearing the Janey Jumper.  Read about it here.
One great thing about this pattern is that there are no sleeves to sew onto the main bodice.  The sleeves are cut out with the front bodice pieces and the back bodice piece, so the only sewing is at the shoulders and down the side seam of the bodice.

I did make a couple of minor modifications though.  First I overlapped the front slightly more than the pattern showed.  I don't ever wear camisoles or tank tops under my clothes, so I wanted to make sure I had full coverage on the top.  Secondly, I chose to shirr the waist area instead of using elastic.  I find the shirred waist to be so much more comfortable and the process of shirring to be so much quicker than making a casing and running the elastic through it.  Oh, and I made a narrow sash to tie around my waist.  You can see the bow and the two rows of shirring in the picture below.


I'm pleased with how well this dress fits me.  It may not be the most flattering design for my body type, but I definitely plan on wearing it a lot regardless.  Now, I just hope it won't be too cold to wear it around at the Sewing Summit!  Gotta run!  I've got a few more things I need to sew myself for the conference.

Wednesday, September 19, 2012

Janey Jumper Pattern


Last year about this time, I became interested in sewing again.  I didn't really know exactly what type of project to begin with, but while at a local fabric store one day, a woman suggested I start out making a pillowcase style dress.  Quite honestly, I had never heard of this.  So, I rushed home and began searching the internet for free patterns.  This is how I became a blogger.

It didn't take long before this one search for a simple pillowcase pattern turned into a daily obsession for me.  One of the first blogs I came across was Lindsay's from The Cottage Home.  I love how she combines colors and prints and transforms these fabrics into beautiful creations for children to wear.  She has a knack for adding just the right kind and amount of embellishment to her garments--like covered buttons, ruffles, decorative trims, and of course, piping!  

Soon, Lindsay came out with her own line of children's patterns, and I knew I just had to have one.  When she had a sale a few months ago, I jumped at the chance to buy the Janey Jumper pattern.  It's a pretty, simple A-line dress with a few different variations for the front offered up in the pattern. 


I guess I have a thing for scallops right now, and this dress along with the Oliver + S Badminton Skort pattern (which I recently purchased but haven't tried yet) were my inspiration for developing my own Scalloped Edge Shorts Tutorial for this summer's Shorts on the Line event.  Now that I own both of these patterns, it's interesting to see other ways to make these scalloped edges!


I cut out the fabric for this dress right after the pattern arrived in the mail, but for some reason, it was at least a month before I had the chance to sew it together.  I checked out the measurements on the pattern and decided to go with the 5T for Ella, and I believe it turned out great with a little extra growing room.  


I made the dress using some quilting cotton for the outer pieces and just bleached muslin for the lining.  The dress is so soft and loose and comfy! You might recognize the pink polka dot fabric.  I used it earlier in the summer to make Ella her second pair of scalloped edge shorts which I loved (and she did too) better than the first pair I made. 
One thing I will say about this variation of the dress is that it is a little heavy toward the front.  Let me explain:  The scallop panels are fully lined and the entire front panel is fully lined meaning there are four layers of fabric on the front!  You can see all four layers in the picture below.  When I make this dress again, I think I will just make a facing for the scallops in an attempt to make the dress more balanced.


Lindsay's instructions for sewing the pieces together are very easy to follow; however, the pattern instructions are printed only in black and white, which makes some of the pictures a little difficult to see clearly.  I've never made an A-line fully lined/reversible dress before, so it was neat to see how this is done!  Lindsay did a great job of explaining it.

The back of the dress has a simple closure that doesn't require a zipper or a button hole!  Yay!  There's no need to change the foot on the sewing machine or cut out interfacing.  I love using this kind of closure and have done this many times before on tops I've whipped up for Ella.  


The thing that took me the longest while making this dress was hand sewing on all 13 buttons (12 on the front and 1 on the back)!  My sewing machine is only a couple of years younger than me, so it is not equipped with a computer or program that allows the machine to sew the buttons onto the dress.  And I couldn't skip this step because the buttons sewn onto the front are what keep the scallop panels in place!  


I do love these buttons though.  They are vintage pearl buttons from my grandmother's stash of buttons, and it just so happened that I had exactly 13 of these left!  Every time I see those buttons on that dress, I am reminded of her.  I know she never would have guessed she was buying buttons   to be used on her great granddaughter's dress some 50 to 60 years later!


I can't wait to try out the other dress variations included in the pattern, and if you don't already own a simple A-line dress pattern for your special little one, then I highly recommend you purchase the Janey Jumper pattern from the Cottage Home.  It's well worth it!  

Wednesday, September 12, 2012

Kelly's Kids Knockoff Dress Pattern


Months ago, I made my friend's daughter this cute Kelly's Kids Caroline Dress for Easter.  You can read the original posts here and here.


I've had several requests for the pattern I came up with to make it, and about a month ago, I finally decided to scan in the pieces.  Well, I didn't stop there. I also figured out how to digitized the pieces so I would have professional looking pattern!  I've finally learned just enough about Photoshop to be dangerous!

Anyway, I've put together a pattern and instructions for making the dress in a size 8.  Now the instructions are not a full tutorial with pictures and such, but I've provided a lot of useful written details on how to sew your very own Kelly's Kids Knockoff Dress!  If I ever decide to make this dress again, I promise I'll put together a picture filled tutorial to share on the blog, but for now, this will have to do.

If you'd like to download the pattern and instructions, click HERE.

And if you have any questions or find any major errors with the pattern, please email me at sewvery(at)gmail(dot)com.

Friday, September 7, 2012

Big Bag of Buttons!


A few weeks ago, I visited my brother and his family.  While I was there, I had an opportunity to go through my grandmother's sewing machine table drawers for vintage goodies.  It was so much fun looking through all the old bobbins, little containers of odd buttons, hemming tape, and even a few handwritten note cards with mine and my mom's measurements from back in the mid 1980's!  Made me feel pretty good that my measurements are pretty much the same except that my bust in now larger!  Ha!  Still made me feel fat seeing my mom's waist measurement of only 24" though.  She always had a teeny tiny waist!

Here's the menagerie of buttons that I found!


I love the old covered buttons that use those metal teeth.  In my opinion, these work so much better than the ones you can buy now, and they don't require you to use that little plastic thing or a hammer to secure the back to the button!  I wonder why they stopped making them that way...


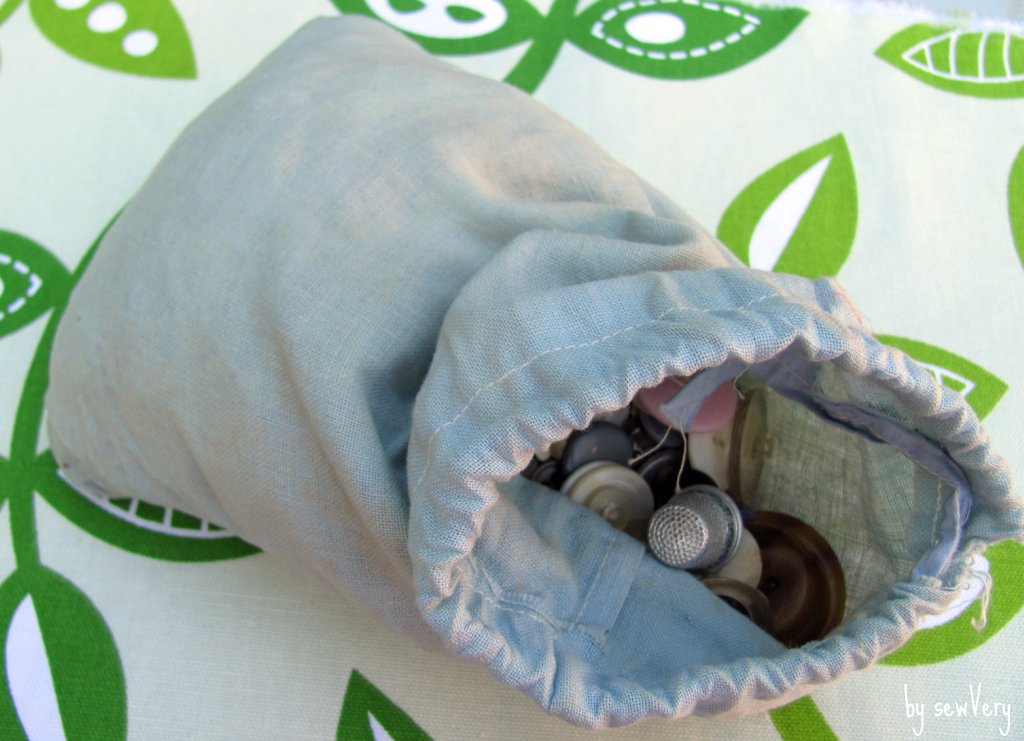
Anyway, tucked away in the bottom drawer of the table, I found this sweet bag full of vintage used buttons!  I was so excited, but resisted the temptation to just dump the bag right then and there.  I decided to wait until I returned home and could take pictures as I opened the bag for the first time it has been opened in at least 14 years!


When I poured the buttons out, I became a little emotional.  Which buttons had been on a piece of my mom's old clothing?  And I even got a whiff of what my grandparent's house used to smell like!  These two women, my grandmother and my mom, taught me the basics of sewing without ever giving me a formal lesson.  I just watched them, helped them lay out fabric and patterns (my grandmother used old silverware knives as weights), learned when to use pinking shears and when to use regular scissors, thread the sewing machine needle (I could see the eye of the needle without glasses), picked out a lot of seams, and pressed open a lot of seams.  I never really sewed anything substantial until I was in my mid 20's.

My grandparents believed in holding onto anything that could be reused later. A lot of these buttons still had the thread or even fabric sewn to them where my grandmother had cut them off a piece of old clothing.


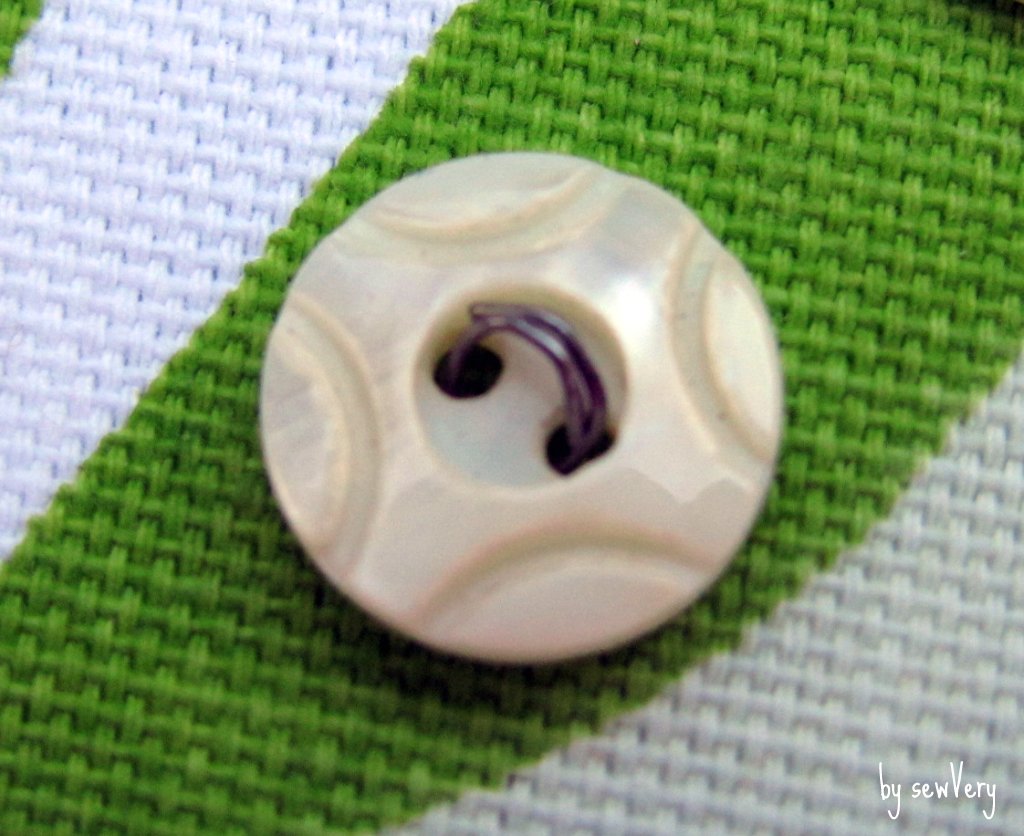
While there aren't a lot of colorful buttons, there were quite a few pearl buttons (and a pearl buckle or two) in the bag, and some even had cut out designs on them.  Here are a few of my favorites.


This one reminds me of an antique deviled egg serving dish!


And this one reminds me of a piece of chocolate candy!  It was the only one of its kind.


There were a few rather large buttons, too.  Here's one of my favorites.


A lonely little red decorative button.


These lovely mother-of-pearl buttons all had a light purple shimmer to them.


I've desperately needed to sort all my buttons out by color, and while on the trip to visit my family, I remembered I had this neat old stick candy jar display that came from my father's pharmacy when I was a kid.  After my dad stopped selling the Old Dutch candy at his store, my mom brought home the jars and kept pens, paper clips, and binder clips stored in them.


While there aren't quite enough jars to sort and store all of the buttons I own now, I believe it comes in quite handy as a way to display all the vintage, loose buttons I have.  I'll just have to continue storing all the other new and vintage buttons that are still on cards in the ziploc bag in my sewing drawer.


To keep the dust out of the button jars, I made these simple little jar covers. Super easy!  Just cut out a circle the diameter of the jar plus 2 inches, then shir two rows of elastic thread spaced roughly 3/8" apart around the edges of the circle.  Spritz with water, apply heat from an iron for a few seconds, and you are done!


Although I now have all these buttons, I am itching to find more!  I've been searching a local thrift store for notions and buttons, so I have a feeling that my collection is going to continue to grow!