home tutorials features parties custom orders

Friday, April 13, 2012

Fun in the Sun Dress!


When I was shopping for fabric with my friend a few weeks ago, I saw this adorable embroidered seersucker at the store.  There were little pink cats, footballs, baby chicks, trains, and butterflies and flowers.  At the time, I didn't buy any, but I really wanted some of that fabric to make Ella an adorable outfit.  I just couldn't figure out exactly what to make though!

Well, after looking through the Kelly's Kids catalog some more, I made up my mind what I could make.  So, I bought some of the berry on white seersucker with embroidered butterflies and flowers to make Ella an adorable sundress. She loves purple and butterflies and flowers, so this was meant for her!


On page 23 of the Spring 2012 Kelly's Kids catalog, there is an adorable sundress made essentially like a pillowcase dress with a large ruffle at the bottom and bias tape ties at the shoulder.  So simple yet so adorable!

Sundress from Kelly's Kids
I decided this would be the perfect dress to make using the purple seersucker fabric I had purchased.  After a couple of hours of cutting and sewing, this is what I ended up making Ella.  Pretty much an exact copy of the $48 dress from Kelly's Kids!  I call it Ella's Fun in the Sun Dress!


Ella has worn this dress three times this week already.  She loves it!  The fabric is so soft and lightweight, and it is perfect for running around and playing.  I think I'll be buying some more seersucker fabric and putting together a couple more of these for the summer.


And if anyone is interested, I've got enough of this fabric to make one more dress (size 2T - 5T).  I'd be more than happy to make one and sell it at a fraction of the cost of the Kelly's Kids version!  Just send me an email or leave me a comment.

Now let me see what else I can find in this catalog to make!  Have a great weekend!

Monday, April 9, 2012

Mommy & Me Skirts

I've been wanting to try shirring again lately, so I decided to make myself a skirt for summer.  I had a couple of shirred waist skirts from Target years ago that I loved, and after seeing this tutorial over at Running with Scissors, I knew I had to give it a try.

Since I don't have much experience with shirring, I decided to use an inexpensive piece of quilting cotton that I had purchased from Joann's a few weeks ago.  I liked the colors and the print was okay, but if this shirring thing didn't work out, I wouldn't feel so guilty about wasting the fabric.


Warning!  The picture you are about to see contains a pair of very, very white legs and me with no make-up on.


I chose not to make the skirt with pockets just to simplify the entire project this time.  The main idea was to practice my shirring technique.

I used the tutorial to determine the width and length of the skirt, but I found that even with her revised notes in the instructions, this was still too much fabric for me.  I also felt like the skirt length she specified was a little long for me.

Last time I shirred something, I made sure to make a note about how I adjusted my sewing machine settings.  This seemed to work out just fine, but when I finished all 10 rows of shirring for the waistband and then spritzed it with water and applied heat, the elastic just did not draw up nearly enough. This is when I discovered that the width of the skirt was just way too big for me.  I even sewed in a few extra rows of shirring hoping it would draw up more, but it didn't.


What I thought was going to be a super quick project turned into an afternoon headache!  I eventually decided to cut off 10" of the width at which point the skirt still fit a little loose.  So, the next time I try making this skirt, I'm only going to multiply my hip measurement by 1.45 (instead of the tutorial recommended 1.75) to get a better fit for me.

After finishing my skirt, I realized that I had enough fabric left over to make Ella one, too.  Since my experience with shirring hadn't gone as well as I had hoped, I opted to just put in a regular elastic waistband on her skirt.


To make the two skirts look even more similar, I added the bias tape at the hem.


This little ruffle and bow were a cute addition to her skirt and gave it more of a girly flare; however, she keeps asking me to remove it (not gonna happen!).


Next time I shirr, I think I'll try using a different brand of elastic thread.  I've read that Stretch-Rite works well (I think it could be because it has more rubber in the elastic than the Dritz brand).  What's your opinion?  Do you have a preference for one elastic thread brand over another?  I'd really appreciate your input on the topic.  Thanks!

Sunday, April 8, 2012

Picture-Perfect Dress


A couple of weeks ago, I made a beautiful white dress for my best friend's daughter.  It was a knockoff of the Caroline Dress from Kelly's Kids.  You can read about that here.

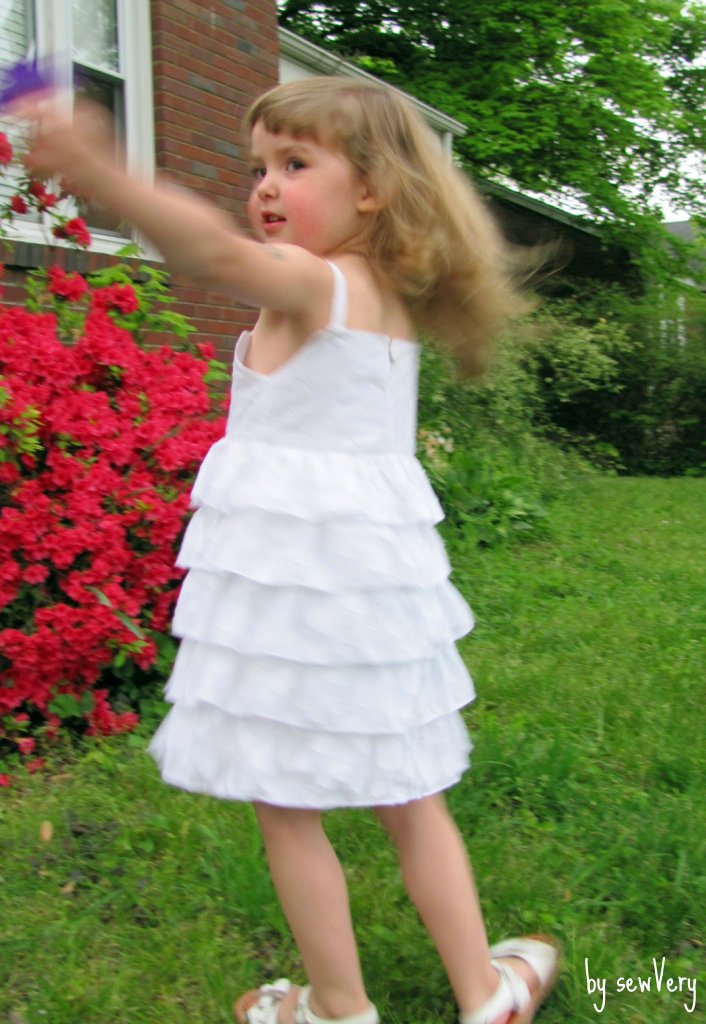
I ended up having enough of that white fabric to make Ella the Picture-Perfect Dress found on page 20 of the book Make It Sew Modern by Vanessa Christenson of V and Co.  This light, fun fabric was a perfect choice for this dress pattern!

Image of Make it Sew Modern by Vanessa Christenson

I followed the instructions for measuring Ella to determine the bodice width and length as well as the skirt width and length; however, I had to make the ruffle strips only 4" wide instead of 4 1/2" in order to get 5 rows of ruffles since I was working with a limited amount of fabric.  It worked out just fine though, don't you think?


I used my serger and hemmed the ruffle edges with a rolled hem which worked out perfectly for this weight of fabric.  It also made quick work of putting this whole dress together!  I'm really loving that sewing technique lately.


The instructions for putting together the back bodice with the elastic and button closure was easy to follow, but I somehow sewed together the lining and dress fabrics along what was suppose to be the length of the bodice instead of the width.  The length and width measurements were only off by about an inch, so it was easy to do if you weren't paying close enough attention.  I guess I wasn't because I then cut out another back bodice and sewed it together the wrong way again!  The second time, though, I caught it before I sewed up the armhole cutouts, so I was able to pick it out and finally get it right the third time!  Ugh!


Ella hasn't been extremely cooperative lately with trying on clothes for fit or letting me use a measuring tape to get a good measurement, so I just had to guess on the length for the shoulder straps.  When she tried the dress on for photos, the straps were too long.  I was lucky to get her cooperation, so I just pinned them temporarily until I can figure out how to fix them without taking the bodice apart.  Any suggestions out there?  They are about an 1" too long.  You can see the straight pin I used in this photo.  Just ignore it please.  Remember, it's suppose to be a Picture-Perfect Dress!


Can you tell I'm hiding something in this next photo?  It's my son's dirty tennis shoes!  He was climbing the tree when I shot this photo, which I think is really cute of Ella.  Oh, well!


Don't you just love the blue fingernails and the bunny rabbit tattoo?  Thank goodness both of those things can be removed easily!


Anyway, this dress was so much fun to make, and Ella's comment the first time she saw it was "It's so beautiful, Moma!".  I just love it when she really likes something I make for her.

Now, if I can just get past my fears of children wearing white, I'll be okay! Since discovering my friend's magical stain removal trick (which by the way she is having to use today on the dress I made for Madalyn), I'm warming up to the idea a lot easier!

This is the second thing I have made from the book Make It Sew Modern, and I highly recommend it.  I checked it out of my local library, but you can buy it from V and Co. on sale for roughly $20.  With all the great patterns and ideas in it, I think it is definitely worth it.  Can't wait to try out another project before I have to return it!


Photobucket


Sew Chatty


Monday, April 2, 2012

Liebster Award


Last week, I was given the Liebster Award by Janelle at Emmaline Bags! Thank you, Janelle!  I am very honored.


The Liebster Award is given to up and coming bloggers with fewer than 200 followers.  Now that I have had this award bestowed upon me, it is my turn to pass it along.  Here are the rules...

1.  Thank the person who gave you the award and link to their blog.
2.  Choose 3-5 blogs with less than 200 followers and pass the award on to them.
3.  Display the Liebster Award somewhere on your blog.

Wow!  I can't believe I have all this power!  Who will I pass this award along to?  Well, I feel the following bloggers definitely deserve it!  Let's give them all a big round of applause!  Yeah!  Whoo Hoo!

A Cup of Tea and A Slice of Cake


Please check out these blogs and become their newest follower!  

Saturday, March 31, 2012

She Likes It! She Likes It!


So, my friend received the special package containing the Kelly's Kids knockoff I made, and her daughter likes it!  Oh, and did I mention that it fit her perfectly, too?!  Yeah!  I'm tickled pink that it all worked out.


Doesn't Madalyn look so grown up in it and her new high heel shoes?  I think she looks beautiful.


Thanks again, Melissa, for giving me the chance to make this.  It definitely gave me a confidence boost knowing that it worked out so well and that you both like it so much.


And I'm glad that Michael likes his new pillowcases, too. I forgot to make a picture of them, so send me one if you get the chance.

Happy Easter and miss you guys!

Covert Robin Mystery Gift Exchange Sneak Peak


the covert robin button

Here's a little sneak at the gift I made for my Covert Robin recipient.  Hope she likes it.  I had such a difficult time deciding what to make, but I am very pleased with it.  I'm getting it in the mail on the very last day!  I must not be the only one because I haven't received anything in the mail yet either!


Friday, March 30, 2012

Caroline Dress by Kelly's Kids Knockoff


Whew!  What a week!  Our family visited some dear friends on the Gulf Coast last weekend where we ate way too much food and stayed up late every night!  But what a fun time we all had.  Thanks for your hospitality, Melissa, Fig, Michael, and Madalyn, and all the treats you gave the kids!  You guys are awesome!

L to R:  Michael, Ella, Connor, Madalyn, Fig, Melissa, and Me (Veronica)
My Wonderful Husband is taking the picture!

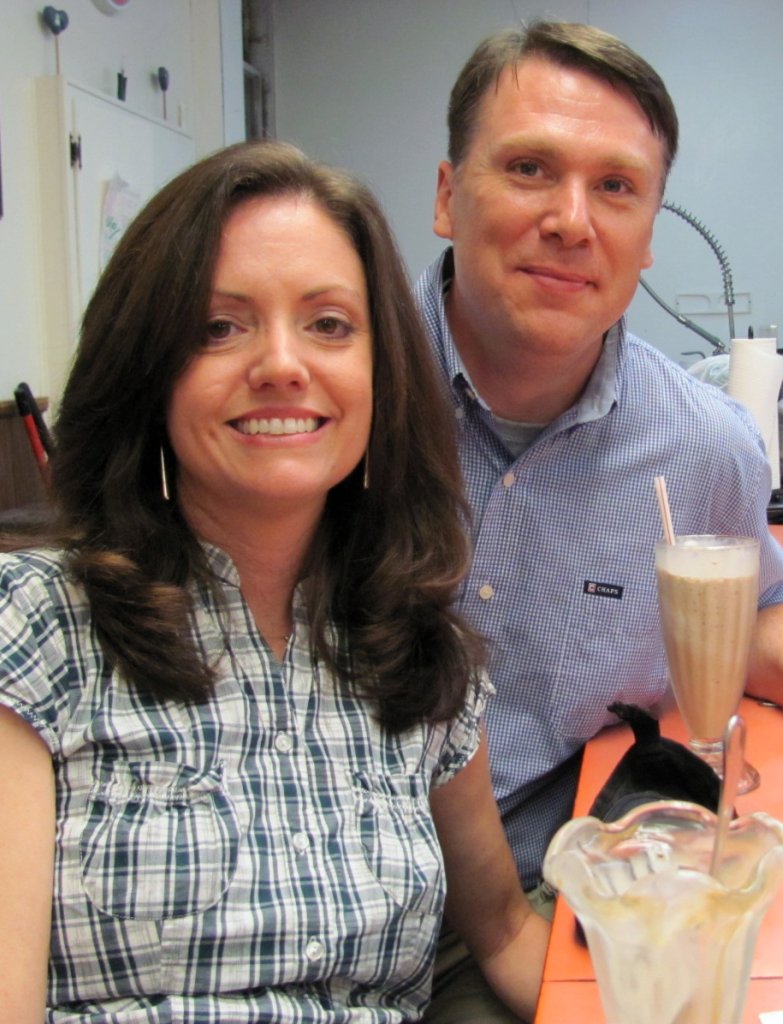
Me and My Wonderful Husband!
While there, my friend Melissa was so gracious to listen to way too much talk about sewing and fabric!  She is the best and never showed anything but enthusiasm for my new found hobby.


We even went fabric shopping in hopes of finding some beautiful eyelet fabric similar to the one used to make this Caroline Dress by Kelly's Kids.

Associated Item
Caroline Dress by Kelly's Kids
You see, Melissa loves this dress and really wanted it for her daughter to wear at Easter, but she didn't want to pay the high price tag!  I don't blame her.  

We searched two stores and didn't find anything exactly like the eyelet, but at Hancock Fabrics we did come across this light and fresh specialty cotton piece with a circle/bubble design.  The fabric is called Dots on White Cotton Fabric but also comes in a rainbow of colors. It was the one, however, Melissa was having second thoughts about me making this in time for Easter.  She was feeling guilty about me spending so much time making it, too.  So, we left the store with no fabric.  I tried to tell her that I enjoy sewing and the creative outlet that sewing gives me. Sewing makes me use parts of my brain that weren't getting used all that often since I no longer practice engineering!

Well, when we left her house on Sunday to drive home, my husband and I stopped by the fabric store to buy the fabric anyway.  I had decided to make the dress and just send it to her, but wouldn't you know it, by Monday afternoon, she had changed her mind and started asking me how much of this and that she needed to go buy.  I had to spoil her surprise and tell her that I was already making it!  She was thrilled.

I found a couple of size 8 dress patterns in my collection and used them as a go-by for the overall bodice size and skirt length, but I had to draft up the front bodice because it has pleats and two vertical ruffles.  My son graciously allowed  me (it cost me a big box of Junior Mints) to hold up the pattern pieces to him to see if they would fit (he's the same age and size as Madalyn).  Once the pattern pieces were assembled, I cut everything out and began sewing!  Here's my knockoff version of the Caroline Dress by Kelly's Kids:


Since I was on a time crunch, I didn't take pictures along the way.  I'm already thinking about making the same dress for Ella--but without the pleats and full lining--so if that happens anytime soon, I'll be sure to take step by step pictures and put up a tutorial and the pattern.  It really was not difficult to make, but I am not the fastest sewer and very meticulous, so it took me longer to make than it might take you.  Plus, this is the first thing I think I have ever made for anyone at their request, so I really wanted it to be perfect.  I think I came pretty darn close!


I had no idea what the back of the dress looked like because the Kelly's Kids website doesn't show any pictures of the back.  The description mentioned it had a button closure, but I wanted this all white beauty to be extra special, so I thought adding the pearl buttons and loop closure on the back made it look more fresh and youthful.  Don't you?!


It's now in the mail, and I can't wait to get a picture of Madalyn wearing it!  I hope it fits, and I hope she loves it!  I had so much fun making it.