My husband's cousin is pregnant with her first child, and I received an invite to her baby shower this weekend. She's having a girl, so I had no problem deciding what to give her. I'd simply sew up something cute and adorable!
I am an affiliate for Peek-a-Boo Pattern Shop, but all the opinions in this post are 100% my own.
I decided to try out the Ruffle Bum Romper by Peek-a-Boo Pattern Shop and the Mary Jane Shoes by Little Shoes. Besides a few doll clothes, I've never made clothes this small before, so I knew this would be fun.
This baby outfit is also my Kid's Clothes Week Day 1 sewing project. Both items were easy to sew together, even with the added monogramming.
First of all, every little baby girl needs a ruffle bottom romper. This type of outfit is just perfect for showcasing chunky baby legs and arms, and the ruffles on the bum make it look even cuter. To make my version of the Ruffle Bum Romper even more adorable on the new baby girl, I opted to add a single letter monogram to the front bodice. I used the Adams Accent Monogram from Embroitque.
The Ruffle Bum Romper pattern is absolutely perfect for adding a monogram or other embroidery/applique design to the front, especially since the front bodice is lined--conveniently covering up the stabilizer and stitching on the back of the bodice.
I hooped the front bodice using Pellon 40 stabilizer and floated a piece of tear away stabilizer under that for extra stability. I could have used solvy on top, but to be honest, I forgot! I think the stitching turned out great though.
This is the first Embroitque design I have used, and I was very please with how the 3" design stitched out. In fact, I think this was my fastest embroidery project ever! It took literally no more than 2 minutes to stitch out the A and the flourishes on the sides.
I almost always have a difficult time deciding what color thread to use on these types of embroidery projects. My first thought was to use red since the ruffles on the bottom are red, but that reminded me too much of the Scarlet Letter! I'm so glad I just went with a slightly darker shade of teal than the fabric. I think it's perfect! Don't you?
Ok. Back to the romper. To make this romper, you'll have to know how to make a buttonhole to thread the ties through. Don't be scared! I know I used to be, but practice, practice, practice and you will get better at it! I did.
For the smaller sizes, you'll also have to know how to install snaps. I have never put snaps on before, but for some reason, I already owned the pliers and a box of snaps! I just followed the instructions on the plier package and did a pretty good job. I did have to pry one off and try again because I somehow put it in the wrong place, but luckily, I didn't tear the fabric when I removed it. I forgot to wash off my mark, but it was made using disappearing ink, so it should just wash out.
The pattern is full of detailed photos and written descriptions on how to assemble every part of the Ruffle Bum Romper. When I first read through the instructions, I was pleasantly surprised at how simple and easy it was to make one. I did do one thing slightly different than the pattern specified. I used my serger to give the ruffles a rolled edge hem instead of folding and pressing the fabric to form the hem. That was just faster for me, plus I like the look on this outfit.
Now, for the next time I make a Ruffle Bum Romper, I will definitely add a small piece of interfacing in between the bodice and bodice lining at the location of the buttonholes as well as add interfacing in the hem before I attach the snaps. The pattern didn't call for any interfacing, but I think it would help the buttonholes hold up longer and keep the snaps from possibly damaging the fabric after a lot of repeated use.
After I finished the romper, I remembered winning some baby shoe patterns from Little Shoes a few months back. I never thought I'd get to use these patterns for anything but doll shoes, but they are the perfect addition to the Ruffle Bum Romper. I even monogrammed the same, but smaller 2" size, Adams Accent Monogram to the top of each little shoe. Why do we find things in miniature so stinkin' cute?!
Since I only have a 5x7 hoop for my Brother PE770 embroidery machine, I traced the two shoe pattern pieces using disappearing ink onto the fabric, hooped them with the same stabilizers I used for the romper, and then stitched out the monogram on each shoe piece. I had drawn mine toe to toe, so I had to flip the design file 180 degrees for the second shoe. Wish I had taken a picture of it in the hoop, but I always forget to do that while I'm working!
These 3-6 month shoes took about an hour to sew together. They were surprisingly easy to make. The Little Shoes Mary Jane Pattern pictures were great in showing where to stitch and how to put the pieces together. However, the written descriptions, although thorough, threw me off a little at times because of their grammar. The pattern provides sizes 0-3 months up to 18 months, and I'll definitely be using this pattern again in the future for more baby gifts!
Well, I better run! The baby shower is this weekend, and I have to get this gift in the mail!
Come back tomorrow to see my Kid's Clothes Week Day 2 project!
Showing posts with label Brother PE770. Show all posts
Wednesday, April 24, 2013
Saturday, March 23, 2013
Bunny Day Outfits
Easter is quickly approaching, and I have been a busy bee at the sewing machine all week!
Today I have three little projects to share with you--two tops and a pair of ruffle bottom jeans. All were fairly simple, so you could still get one or all three of these done for your precious little girl before Bunny Day next weekend.
Up first is this adorable purple gingham swing top I made using an adapted version of the Evelyn Dress Pattern from Peek-a-Boo Pattern Shop. I've used this pattern tons to make swing tops and a-line dresses that I then machine embroider. I'm pretty sure I could make this version of the pattern in my sleep by now. It's a great base pattern to use. I highly recommend it!
I appliqued this Bunny Alpha design from Planet Applique onto the front of the top using some super-duper soft minky fabric.
The letter is suppose to be a bunny face with ear, but the fabric is so fluffy, the eyes, nose, and whiskers of the bunny are nearly lost in all the fluff. I trimmed quite a bit off, but it obviously didn't help a that much. Ella doesn't mind though. She loves to pet it!
I didn't make this particular swing top reversible like I have some others seen here and here. I was in a hurry and wanted to keep things simple. I did fully line it with white muslin though.
To complete Bunny Day Outfit No. 1, I added these cute banded ruffles to the bottom of some jeans that fit Ella everywhere but in length.
Destri over at The Mother Huddle had blogged about this idea earlier this year, and I quickly pinned it. When I was cleaning out Ella's closet and found these jeans, I knew her tutorial for Banded Ruffle Cuff Pants would be a perfect way to salvage these jeans for a few weeks more use!
Instead of adding a bow like the one used in the original tutorial, I used some crocheted trim to cover up the center seam. There are a lot of ways you could add extra detail to this, and now I can't wait to for her to need another pair so I can play around with the finishing touches more!
For Bunny Day Outfit No. 2, I used this cute 3/4 sleeve raglan tee with 3 bunnies appliqued on the front. The t-shirt is from Kavio and the embroidery design is from Planet Applique (and it's on sale right now for just 50 cents). I used some gingham in blue, pink, and purple for the appliqued bunnies. I just love gingham fabric! Can't you tell?
And to make the applique fabric stay nice and smooth wash after wash, I used Heat-n-Bond Lite to fuse the applique fabric to the shirt before I satin stitched around each one. I also used Pellon #40 cut away stabilizer on the back.
This is my favorite little embroidery project yet. Ella has received so many compliments the couple of times she has worn it already. Paired up with this cute little bunny barrette that my friend from Sewing Mama RaeAnna made, and she's ready for some Easter egg hunting!
To complete the Bunny Day Outfit No. 2, Ella just wears the same ruffle bottom jeans that I made for Outfit No. 1! I love it when separates can be mixed and matched with other pieces!
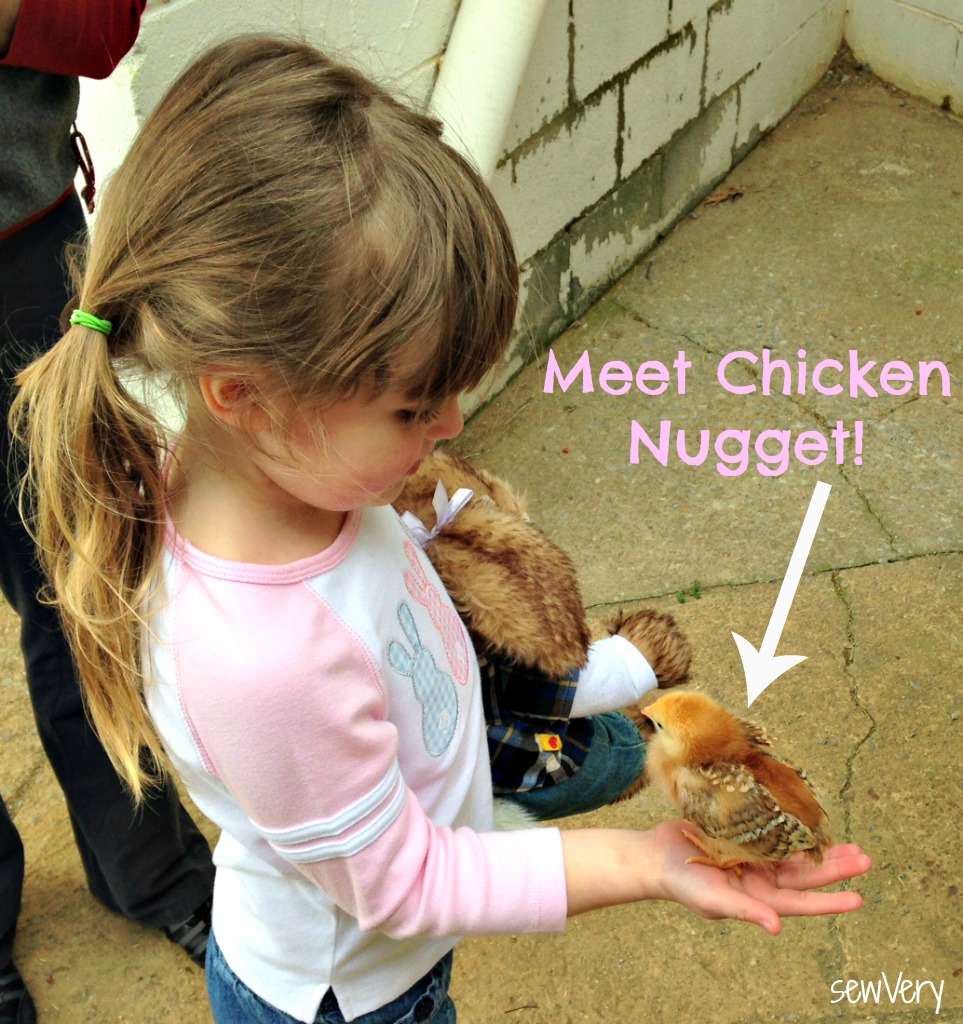
Hope you've found something on my sewVery blog to inspire you today! Oh, and I thought I share a few other pictures from our day out at the agricultural park. Happy Easter!
Up first is this adorable purple gingham swing top I made using an adapted version of the Evelyn Dress Pattern from Peek-a-Boo Pattern Shop. I've used this pattern tons to make swing tops and a-line dresses that I then machine embroider. I'm pretty sure I could make this version of the pattern in my sleep by now. It's a great base pattern to use. I highly recommend it!
I appliqued this Bunny Alpha design from Planet Applique onto the front of the top using some super-duper soft minky fabric.
I didn't make this particular swing top reversible like I have some others seen here and here. I was in a hurry and wanted to keep things simple. I did fully line it with white muslin though.
To complete Bunny Day Outfit No. 1, I added these cute banded ruffles to the bottom of some jeans that fit Ella everywhere but in length.
Destri over at The Mother Huddle had blogged about this idea earlier this year, and I quickly pinned it. When I was cleaning out Ella's closet and found these jeans, I knew her tutorial for Banded Ruffle Cuff Pants would be a perfect way to salvage these jeans for a few weeks more use!
Instead of adding a bow like the one used in the original tutorial, I used some crocheted trim to cover up the center seam. There are a lot of ways you could add extra detail to this, and now I can't wait to for her to need another pair so I can play around with the finishing touches more!
For Bunny Day Outfit No. 2, I used this cute 3/4 sleeve raglan tee with 3 bunnies appliqued on the front. The t-shirt is from Kavio and the embroidery design is from Planet Applique (and it's on sale right now for just 50 cents). I used some gingham in blue, pink, and purple for the appliqued bunnies. I just love gingham fabric! Can't you tell?
And to make the applique fabric stay nice and smooth wash after wash, I used Heat-n-Bond Lite to fuse the applique fabric to the shirt before I satin stitched around each one. I also used Pellon #40 cut away stabilizer on the back.
This is my favorite little embroidery project yet. Ella has received so many compliments the couple of times she has worn it already. Paired up with this cute little bunny barrette that my friend from Sewing Mama RaeAnna made, and she's ready for some Easter egg hunting!
To complete the Bunny Day Outfit No. 2, Ella just wears the same ruffle bottom jeans that I made for Outfit No. 1! I love it when separates can be mixed and matched with other pieces!
Hope you've found something on my sewVery blog to inspire you today! Oh, and I thought I share a few other pictures from our day out at the agricultural park. Happy Easter!
Saturday, March 16, 2013
Shamrock Circle Skirt
As some of you may know, I purchased an embroidery machine a few months ago. At first, I thought I could recoup some of the cost of the machine by making reversible a-line embroidered dresses and t-shirts for sale, and while I have sold a few, the orders aren't pouring in. I can only make my daughter so many embroidered t-shirts and reversible dresses of her own, so I decided to embroider a shamrock onto a circle skirt for St. Patrick's Day instead.
This was my first time making a circle skirt. It was super easy! I used this popular tutorial over at Made. First, I took Ella's measurements and followed the formulas for computing the radii of the inner and outer circles, then using my fabric pencil, marked the fabric accordingly.
For a circle skirt this small, you can cut out the entire skirt and have absolutely no seams to sew! All I had to do was finish the raw edges at the top and bottom, sew on the elastic, and hem the skirt.
I only had a piece of 3/4" wide elastic on hand instead of the 2" wide elastic recommended in the tutorial, but I was pleased with how it worked out for Ella's skirt. However, the waistband was much too big, so I ended up cutting about 2" off the length to make it tight enough to stay up on Ella's waist. The trickiest part of making this skirt is sewing the elastic waistband on! Glad when I was done with that step.
Since I wanted this to be a cute skirt for St. Patrick's Day, I used my Brother PE770 embroidery machine to stitch a shabby four leaf clover onto the bottom of the skirt.
The embroidery design is from Planet Applique. I used the exact same design on a t-shirt I made Ella. Read about it and the ruffle bottom pants I made to go with it here.
This embroidery design took literally less than 10 minutes to stitch out. Since it is a shabby design, I opted to use a piece of white flannel under both the pink and green fabrics to help give the shabby edges more fluff once they are clipped. I've used white muslin or white cotton fabric in lieu of the flannel before, but I much prefer how the flannel added both stability to the overall design as well as more shabbiness to the edges!
With the four leaf clover design stitched in place, I felt like the skirt needed a little more pop of color to complete the look. I found some bubblegum pink ric rac in my stash and proceeded to stitching it onto the edge. This made hemming the bottom of the circle skirt a cinch!
I used my little sewVery label folded in half to cover up the ugly seam where the ric rac ends connected. I barely had enough of it to finish the skirt!
Circle skirts are so much fun to twirl in, but I think I need to make her a pair of bloomers to wear under it now! At full twirl, you definitely see her underwear, and that's why you don't see a picture of her twirling in it!
Now we just need to find a St. Patrick's Day sock hop for Ella and Connor to attend! Don't they look cute all dressed up?
This was my first time making a circle skirt. It was super easy! I used this popular tutorial over at Made. First, I took Ella's measurements and followed the formulas for computing the radii of the inner and outer circles, then using my fabric pencil, marked the fabric accordingly.
For a circle skirt this small, you can cut out the entire skirt and have absolutely no seams to sew! All I had to do was finish the raw edges at the top and bottom, sew on the elastic, and hem the skirt.
I only had a piece of 3/4" wide elastic on hand instead of the 2" wide elastic recommended in the tutorial, but I was pleased with how it worked out for Ella's skirt. However, the waistband was much too big, so I ended up cutting about 2" off the length to make it tight enough to stay up on Ella's waist. The trickiest part of making this skirt is sewing the elastic waistband on! Glad when I was done with that step.
Since I wanted this to be a cute skirt for St. Patrick's Day, I used my Brother PE770 embroidery machine to stitch a shabby four leaf clover onto the bottom of the skirt.
The embroidery design is from Planet Applique. I used the exact same design on a t-shirt I made Ella. Read about it and the ruffle bottom pants I made to go with it here.
This embroidery design took literally less than 10 minutes to stitch out. Since it is a shabby design, I opted to use a piece of white flannel under both the pink and green fabrics to help give the shabby edges more fluff once they are clipped. I've used white muslin or white cotton fabric in lieu of the flannel before, but I much prefer how the flannel added both stability to the overall design as well as more shabbiness to the edges!
With the four leaf clover design stitched in place, I felt like the skirt needed a little more pop of color to complete the look. I found some bubblegum pink ric rac in my stash and proceeded to stitching it onto the edge. This made hemming the bottom of the circle skirt a cinch!
I used my little sewVery label folded in half to cover up the ugly seam where the ric rac ends connected. I barely had enough of it to finish the skirt!
Circle skirts are so much fun to twirl in, but I think I need to make her a pair of bloomers to wear under it now! At full twirl, you definitely see her underwear, and that's why you don't see a picture of her twirling in it!
Now we just need to find a St. Patrick's Day sock hop for Ella and Connor to attend! Don't they look cute all dressed up?
And in case you are wondering, I made my son's pants and vest, too. They are the Little Gentlemans Pants and Vest Pattern from Peek-a-Boo Pattern Shop. Read all about them here.
Happy St. Patrick's Day!
Wednesday, March 13, 2013
St. Patrick's Day Shirt & Ruffle Pants
Well, another holiday is almost here, and it's the perfect excuse for me to use my embroidery machine to stitch up a cute design for a t-shirt for Ella. Oh, and of course, she needs some new ruffle bottom pants to go with the shirt. Right? I'm sure my daughter is in no need of new clothing, but I just love sewing and making fun things for her to wear. You know what? She really loves it, too!
Anyway, I stitched up this shabby four leaf clover from Planet Applique in 10 minutes using my Brother PE770 embroidery machine. I think this is the simplest embroidery project I've done yet! The only thing I wish I had done differently is position the design a little higher up on the shirt, but oh, well! It's still adorable and perfect for St. Patrick's Day!
I used medium weight (Pellon No. 40) cut away stabilizer on the back, plus I doubled my fabric by using a piece of white flannel behind each print to give the edges more fluff when they were snipped. I've tried using other fabrics like white cotton or muslin, but so far, I prefer to use the flannel.
Now it's been forever since I've made Ella a pair of ruffle bottom pants, so I took this opportunity to whip her up a new pair to match the St. Patrick's Day shirt. I used McCall's M6530 pattern, View D.
These pants were made using the size 4T length and the size 5T width and stride measurements. I also added a second ruffle by cutting it out 1" shorter than the pattern ruffle measurement and in the same pink fabric I used on the t-shirt.
Finally, I hemmed the ruffles using the rolled hem settings on my serger. Stitch a label on there and call it done!
These were super easy and fun to sew together, so I know I'll be using this McCall's pattern again and again. Ella loves these pants and already wants another pair! Great! More sewing for me!
Happy St. Patrick's Day! Linking up at the parties shown below as well as others listed here.

Anyway, I stitched up this shabby four leaf clover from Planet Applique in 10 minutes using my Brother PE770 embroidery machine. I think this is the simplest embroidery project I've done yet! The only thing I wish I had done differently is position the design a little higher up on the shirt, but oh, well! It's still adorable and perfect for St. Patrick's Day!
I used medium weight (Pellon No. 40) cut away stabilizer on the back, plus I doubled my fabric by using a piece of white flannel behind each print to give the edges more fluff when they were snipped. I've tried using other fabrics like white cotton or muslin, but so far, I prefer to use the flannel.
Now it's been forever since I've made Ella a pair of ruffle bottom pants, so I took this opportunity to whip her up a new pair to match the St. Patrick's Day shirt. I used McCall's M6530 pattern, View D.
These pants were made using the size 4T length and the size 5T width and stride measurements. I also added a second ruffle by cutting it out 1" shorter than the pattern ruffle measurement and in the same pink fabric I used on the t-shirt.
These were super easy and fun to sew together, so I know I'll be using this McCall's pattern again and again. Ella loves these pants and already wants another pair! Great! More sewing for me!
Happy St. Patrick's Day! Linking up at the parties shown below as well as others listed here.
Friday, February 15, 2013
Dangerous with Scissors Sewing Bag
My super talented friend, Heather from The Sewing Loft, asked me to test out a new machine stitched embroidery design she developed--Dangerous with Scissors!
It took only 20 minutes to stitch up on my Brother PE770 embroidery machine and another 30 to 40 minutes to make this sewing bag.
What a super cute quick project! And I needed a little bag just like this to carry some sewing to work on while I wait for my daughter at dance lessons!
If you'd like to snag this fun embroidery design for yourself, head over to The Sewing Loft where Heather is generously offering the file for free when you subscribe to her newsletter!
I had thought I would buy some rope to use for the handles, but at the last minute I decided to just use some fabrics I had on hand that had lots of purple in them which matched the thread I used for the Dangerous with Scissors design.
I cut out three 1" strips of fabric the width of the fabric (roughly 42") and then braided them together. Slip the ends through the gussets and tie them off with a sturdy knot. These handles ended up being just the right length for me in case I want to carry the bag on my shoulder.
This cute Dangerous with Scissors embroidery design would also be ideal for use on a zipper pouch, apron, pillow, or t-shirt for a sewer or a hair stylist. And don't forget, Heather's offering the design file for free when you subscribe to her newsletter at The Sewing Loft.
Subscribe to:
Posts (Atom)