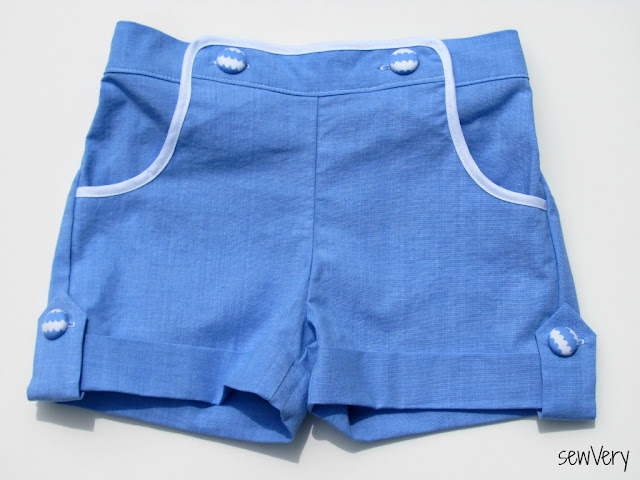
I also made a pair of Peek-a-Boo Pattern Sailor Shorts with the pattern I bought a few weeks ago on the Shop's Thrifty Thursday sale. Most Thursdays, Amy offers up one of her patterns for just $4! Aren't these cute?!
As soon as it was confirmed that I would test the Hattie Button-Up Tank pattern, I knew which fabrics I would be using for this ensemble. I recently purchased for next to nothing at Joann's a nearly yard remnant of Little Lisette's Sailboat Waves Stripes on Poplin. Plus, I picked up a couple of yards of stretch chambray fabric at Hancock's. These were perfect pairings for this fresh summer outfit, plus I still have plenty of both fabrics left over for another project!
The Hattie Button-Up Tank appealed to me from the start because of the ruffled button placket and the tie at the bottom. I love details!
Instead of making the ruffles along the placket, I chose to use eyelet trim instead. However, the pattern does provide measurements and instructions on how to cut out and make your own ruffle pieces.
There was something about this little outfit that just reminded me so much of my youth. One of my mom's favorite fabrics to sew with was chambray, and just thinking about the dresses and jumpers she made for me using this fabric made me smile. Also, the azaleas were in bloom, and my mom used to always have me stand in front of them for spring-time photos.
Instead of using plain buttons, I made covered buttons out of the blouse fabric to match. Don't you think it's a nice addition to this look?
I made Ella's Hattie Button-Up Tank and Sailor Shorts in a size 5T, and I'm very pleased with the overall fit. The only thing I will do differently for the next pair of Sailor Shorts I make is use a shorter piece of elastic for the back waistband. I used the measurement provided in the pattern, and the shorts were just a little loose on Ella, especially after a lot of running around and squatting to pick flowers.
For the Sailor Shorts, I used store bought narrow bias tape to trim the pockets. The inside of the pockets is lined with the shirt fabric, and the buttons on the front and side tabs are also covered buttons made using the blouse fabric.
The great thing about this Sailor Shorts pattern is that the pockets and front buttons are all functional.
So, I decided to make my own cuff tabs and write up a tutorial so you, too, can add them to your Peek-a-Boo Pattern Sailor Shorts. Come back tomorrow for the full pictorial tutorial!
I already have plans to sew up another Hattie Button-Up Tank and pair of Sailor Shorts because I know this is going to be a favorite summer time outfit in our house!
Thanks for stopping by, and don't forget to come back tomorrow to see how to add a Button Tab to a pair of Cuffed Shorts! If I don't see you here, this is how I will feel...
Don't forget to enter the two contests I have going on this week as part of Sew Mama Sew's Giveaway Day! Giveaway No. 1 is for 24 Yards of Fabric from 18 of your favorite sewing bloggers plus a terrific pdf pattern bundle, and Giveaway No. 2 is for a bag made by me using some of my favorite Joel Dewberry fabrics.
And as always, I hope you'll decide to become a follower of my blog and my Facebook page!


very cute!
ReplyDeleteThat's gorgeous! I really should sew more for my kids!
ReplyDeletesweet summer outfit!! that i bet will get lots of wear.
ReplyDeleteThis is a darling outfit! And I love that pouty face at the end! ;)
ReplyDeleteThose shorts are adorbale! The top is cute too! Thanks for sharing @ Submarine Sunday!
ReplyDeleteLove the sailboat stripe fabric, darling.
ReplyDelete